Installing the M.2 NVMe SSD on the system board

NVMe SSDs are directly attached to the PCIe interface and do not have a dedicated hardware RAID engine similar to SAS controllers. This means that RAID configuration for NVMe SSDs is only supported through the operating system.

IMPORTANT:

When installing HPE 400 GB NVMe x4 MU M.2 22110 DS SSD (875583-B21) and HPE 480 GB NVMe x4 RI M.2 22110 DS SSD (875579-001) modules, the supporting ambient temperature should be under 30°C (86°F).

Prerequisites

Before you perform this procedure, make sure that you have the following tools available:

  • T-15 Torx screwdriver

  • 4.5 mm hex nut screwdriver

  • Phillips No. 1 screwdriver

Procedure
  1. If installed, remove the front bezel.
  2. Power down the server.
  3. Remove all power:
    1. Disconnect each power cord from the power source.
    2. Disconnect each power cord from the server.
  4. Disconnect all peripheral cables from the server.
  5. Remove the server from the rack.
  6. Remove the access panel.
  7. If an expansion board is installed in the riser board slot 1, remove the riser cage.
  8. Remove the M.2 air guider.

    Removing the M.2 air guider
  9. Identify the M.2 SSD type to be installed, and then locate the standoff position corresponding to that type.
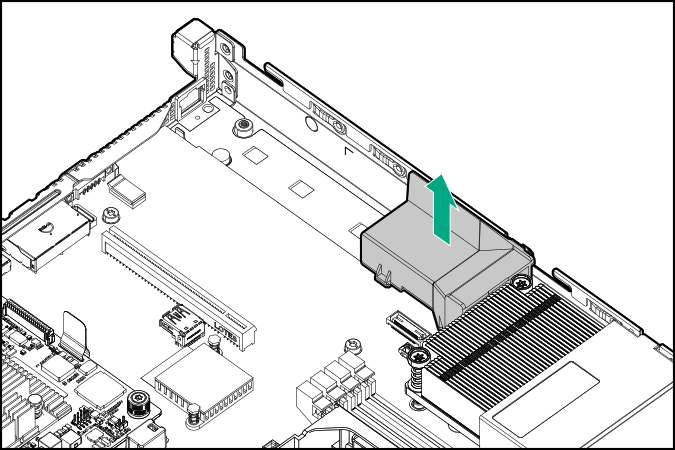
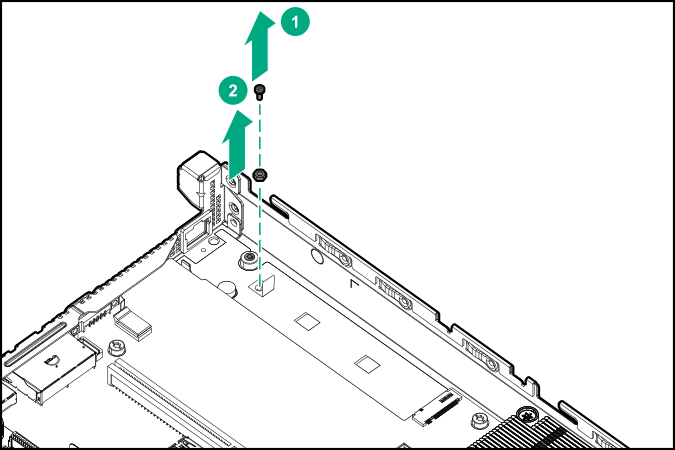
  10. Do one of the following:
    • For M.2 2242 or 2280 SSD installation, remove the hex nut and Phillips screw.
      Removing the hex nut and Phillips screw for M.2 2242 or 2280 SSD installation in the system board

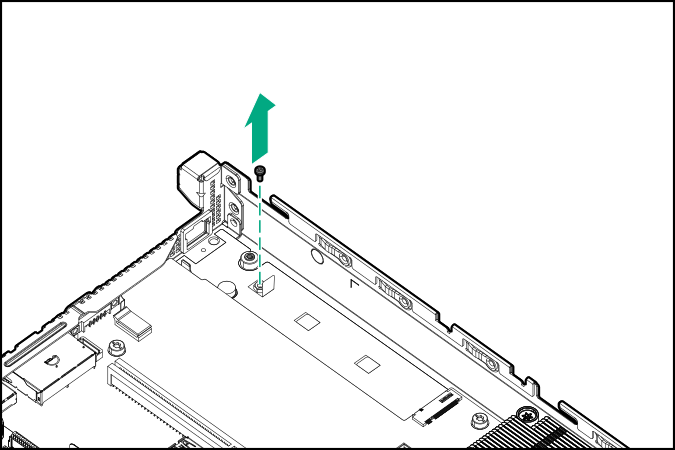
    • For M.2 22110 SSD installation, remove the Phillips screw.


      Removing the Phillips screw for M.2 22110 SSD installation in the system board
  11. Install the hex standoff on the 2242 or 2280 standoff position on the system board.

    Installing the standoff (hex nut) screw on the 2242 or 2280 standoff position on the system board
  12. Install an M.2 NVMe SSD on the system board:
    1. Insert the SSD into the M.2 slot at a 45° angle.
    2. Carefully press the SSD down to the horizontal position.
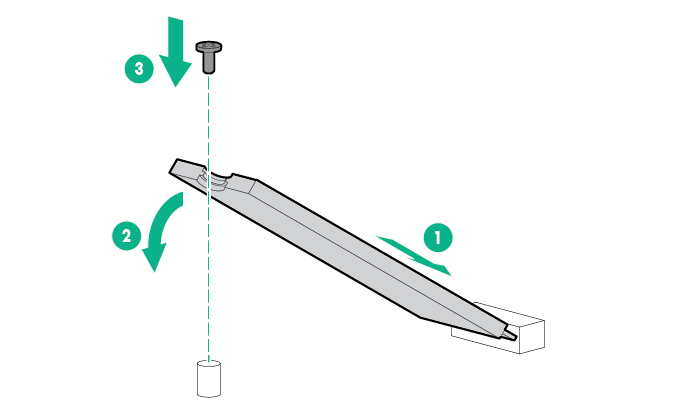
    3. Install the SSD mounting screw.


      Installing an M.2 NVMe SSD on the system board
  13. If removed, install the riser cage.
  14. Install the M.2 air guider.

    Installing the M.2 air guider
  15. Install the access panel.
  16. Install the server into the rack.
  17. Connect all peripheral cables to the server.
  18. Connect the power cords:
    1. Connect each power cord to the server.
    2. Connect each power cord to the power source.
  19. Power up the server.
  20. If removed, install the front bezel.

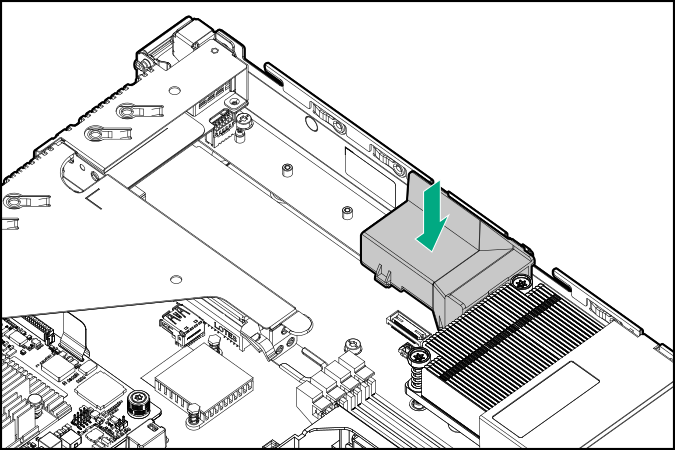
The installation is complete.