Installing the Pensando DSP DSC-25 2p SFP28 card with the iLO Sideband ALOM Module
The DSC-25 card can be installed only in the primary riser cage.
Images in the procedure might differ from actual product.
-
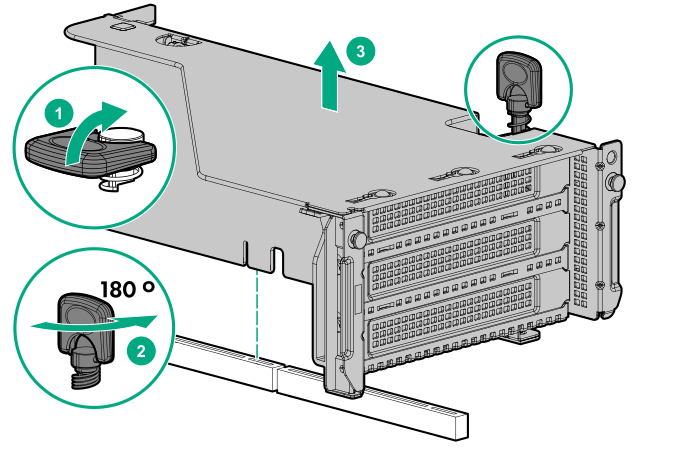
Remove the primary
PCIe riser cage to access the slot on the system board in which to install the
ALOM module.
-
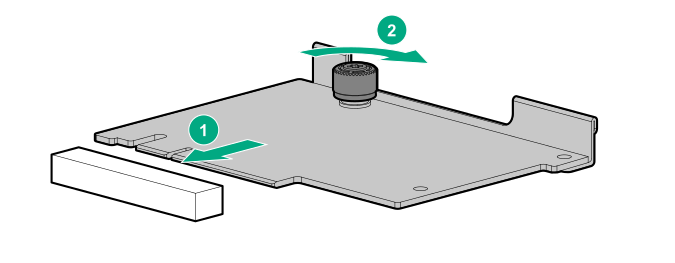
Install the
Pensando DSP iLO Sideband ALOM Module into the FlexibleLOM adapter connector on the system board.
-
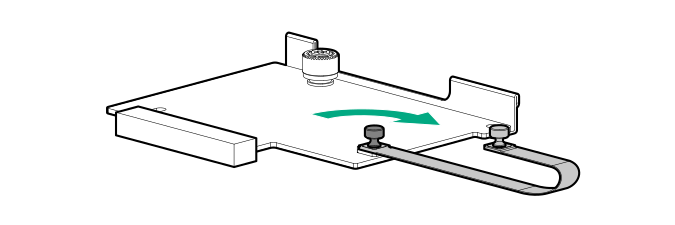
Connect the auxiliary cable to the
iLO Sideband ALOM Module:
- Secure the auxiliary cable to the
ALOM module using the thumb screw.
CAUTION:
Do not over torque the screw.
CAUTION:Do not use a screwdriver to tighten the screw.
CAUTION:Do not twist the cable service loop during installation.
- Secure the auxiliary cable to the
ALOM module using the thumb screw.
-
Install the
DSC-25 card card.
- Remove the expansion slot blank.

- Install the
DSC-25 card into the slot.
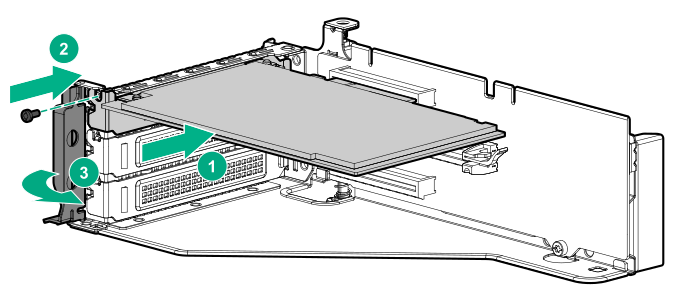
NOTE:Be sure that you install the DSC-25 card into a slot that allows the cable to make connection to the ALOM module.
- Remove the expansion slot blank.
-
Install the
PCIe riser cage into the server.
CAUTION:
Do not twist the cable service loop during installation.

-
Connect the auxiliary cable to the
DSC-25 card:
- Secure the auxiliary cable to the
DSC-25 card using the thumb screw.
CAUTION:
Do not over torque the screw.
CAUTION:Do not use a screwdriver to tighten the screw.
CAUTION:Do not twist the cable service loop during installation.
NOTE:The PCIe riser cage is not shown in this illustration for clarity purposes.
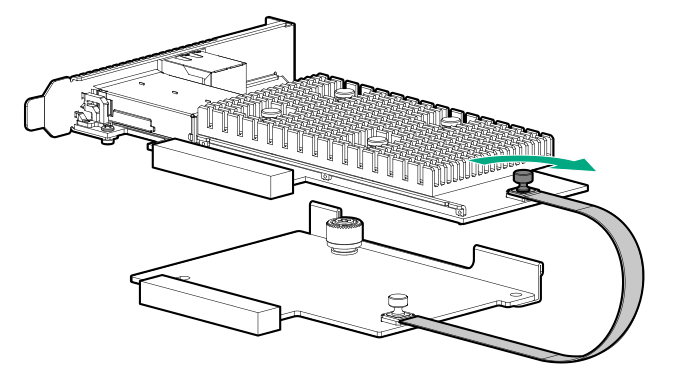
- Secure the auxiliary cable to the
DSC-25 card using the thumb screw.
The installation is complete.