Remove a drive from the front drive cages
WARNING: To reduce the risk of personal injury or equipment damage, be sure that the rack is adequately stabilized before extending a component from the rack.
WARNING: To reduce the risk of personal injury from hot surfaces, allow the drives, power input modules, and the internal system components to cool before touching them.
CAUTION: Do not operate the
server for long periods with the front drive cages extended. When the front drive cages are extended while the
server is powered on, do one of the following:
- If the iLO 08-HD Max sensor reading is reporting a temperature value, monitor the status of the front drive health/thermal LED. When this LED starts flashing amber, immediately slide the drive cages back into the chassis and keep them there until the LED turns green.
- If the iLO 08-HD Max sensor reading is reporting an N/A value, monitor how long the drive cages have been out of the chassis. Before reaching the 140 sec mark, slide the drive cages back into the chassis and keep them there for at least 300 sec before extending them out again.
Failure to observe this caution will result in improper airflow and insufficient cooling that can lead to thermal damage.
CAUTION: Do not operate the
server with any of the front drive cage 1 bays empty. To maintain proper airflow and sufficient cooling in the front drive cage 1, all drive bays in this cage should have a drive or a drive blank.
- Back up all server data.
-
Do one of the following:
- If you intend to remove a drive from the front drive cage 1 and the security bezel is installed, remove the bezel.
- If you intend to remove a drive from the front drive cage 2, extend the front drive cages out of the chassis.
-
To remove an LFF drive:
- Determine the status of the drive from the drive LED definitions.
- Wait until the Online/Activity LED stops flashing.
- Press the latch to open the release lever.
-
Pull the release lever to disengage the drive from the backplane, and then slide the drive out of the bay.

-
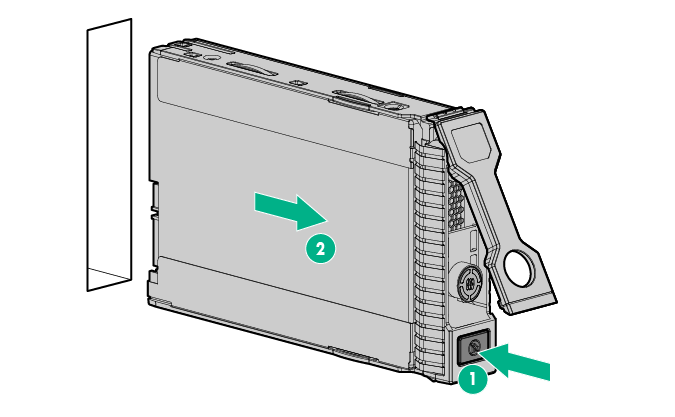
To remove an SFF drive:
- Determine the status of the drive from the drive LED definitions.
- Wait until the icon in the Do Not Remove button stops flashing and is no longer illuminated.
- Press the Do Not Remove button to open the release lever.
-
Pull the release lever to disengage the drive from the backplane, and then slide the drive out of the bay.