Install the server into the rack
Steps 1 and 2 in this section only apply to the first time installation of the server into the rack.
-
Install the
server
rack rail in the
rack.
See the documentation that ships with the HPE 2U Shelf-Mount Adjustable Rail Kit.
-
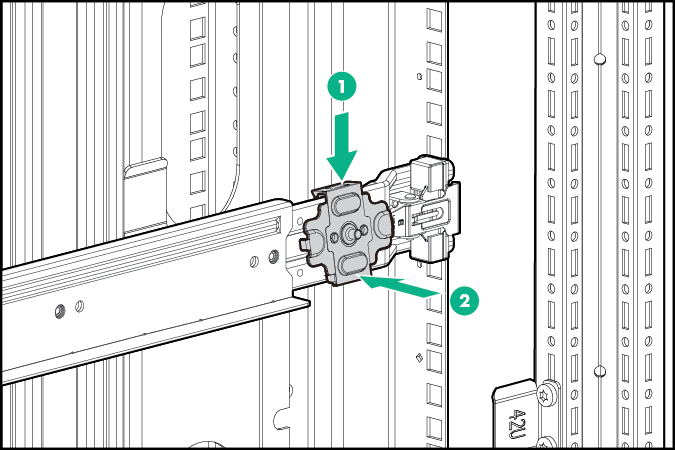
The
chassis retention brackets help to stabilize the
server when the front drive cages are extended.
The illustration below shows the rack rail with the shelf portion highlighted in gray.
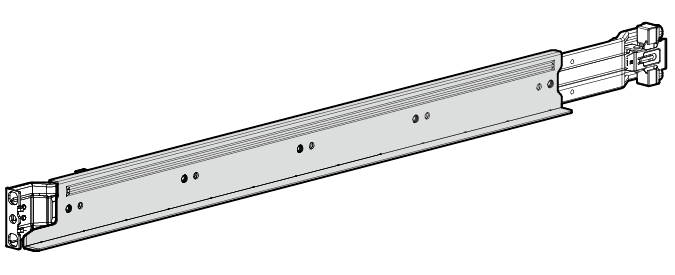
Install the chassis retention brackets on the non-shelf portion of the rack rail.
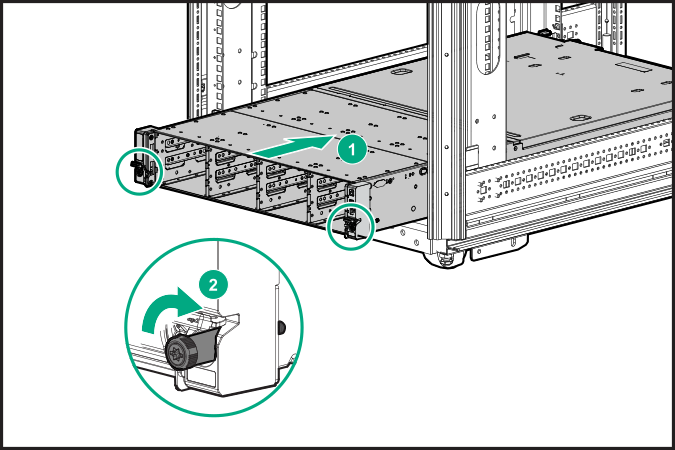
- Install the server into the rack.
-
Tighten the
rack ear thumbscrews.
-
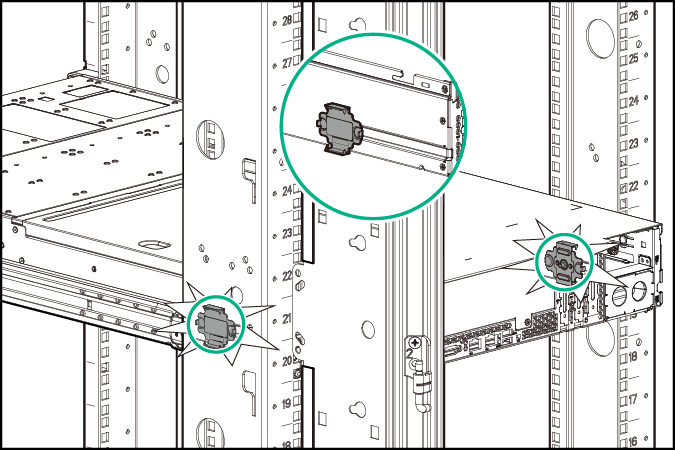
Make sure the pins on the
chassis retention brackets slot into the notches located on both sides of the
chassis.
- Install the drives in the front drive cages.
- Option: Install the security bezel.
-
Optional: Install the drives in the rear drive cage.
WARNING: To reduce the risk of electric shock, fire, or damage to the equipment, do not plug telephone or telecommunications connectors into RJ-45 connectors.
-
Connect peripheral devices to the
server.
For information on identifying connectors, see Rear panel components.
- Install the power input module.
-
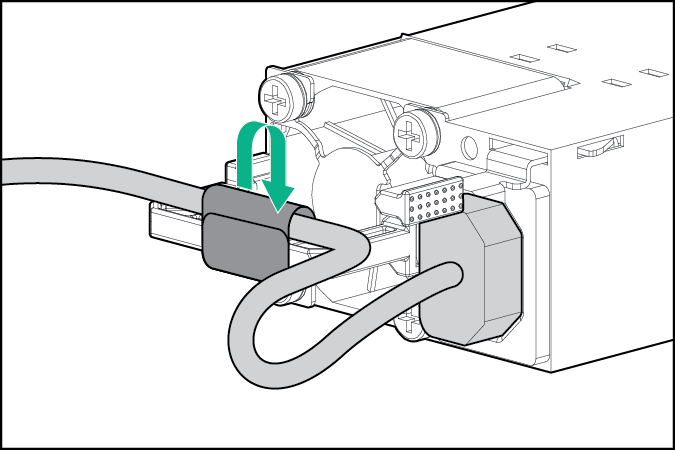
To prevent accidental power cord disconnection when sliding the
server in and out of the
rack, secure the power cord in the strain relief strap attached to the power input module handle:
-
Unwrap the strain relief strap from the power input module handle.
CAUTION: To prevent possible serveroverheating, always populate each processor socket with a processor socket cover and a processor blank, or a processor and a heatsink.
-
Secure the power cord with the strain relief strap.
Roll the extra length of the strap around the power input module handle.
-
AC power input module
-
DC power input module

-
-
Unwrap the strain relief strap from the power input module handle.
- Employ best practices to route and manage the power cords and other cables in the server rear panel.
-
Connect the power cord to the power source.
WARNING: To reduce the risk of electric shock or damage to the equipment:
-
Do not disable the power cord grounding plug. The grounding plug is an important safety feature.
-
Plug the power cord into grounded (earthed) electrical outlet that is easily accessible at all times.
-
Unplug the power cord from the power supply to disconnect power to the equipment.
-
Do not route the power cord where it can be walked on or pinched by items placed against it. Pay particular attention to the plug, electrical outlet, and the point where the cord extends from the server.
-