Installing the server into the rack

Procedure
  1. Observe the following alert:
    CAUTION: Always plan the rack installation, so that the heaviest item is on the bottom of the rack. Install the heaviest item first, and continue to populate the rack from the bottom to the top.
  2. Install the server and cable management arm into the rack. For more information, see the installation instructions that ship with the 2U Quick Deploy Rail System.
  3. Connect peripheral devices to the server. For information on identifying connectors, see Rear panel components.
    WARNING: To reduce the risk of electric shock, fire, or damage to the equipment, do not plug telephone or telecommunications connectors into RJ-45 connectors.
  4. Connect the power cord to the rear of the server.
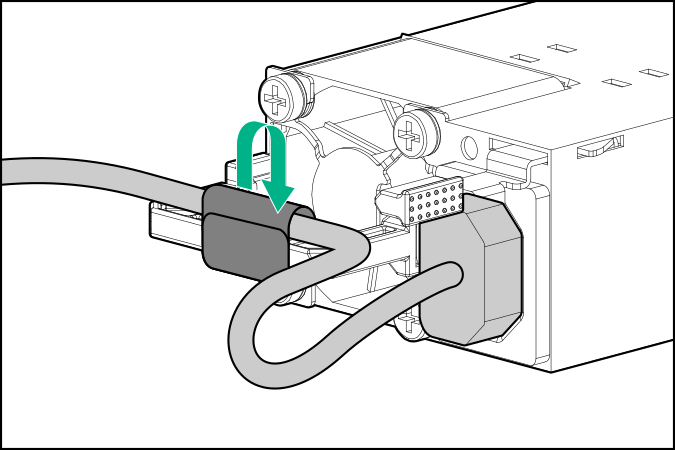
  5. Install the power cord anchors.

    power cord anchors
  6. Install the rack rail hook-and-loop strap.
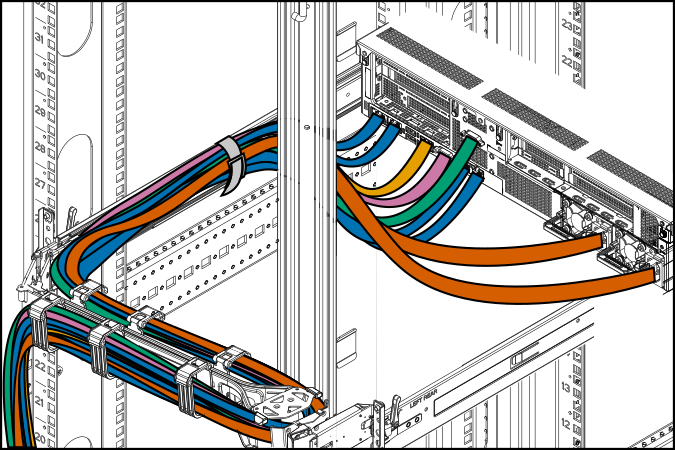
  7. Secure the cables to the cable management arm.
    IMPORTANT: When using cable management arm components, leave enough slack in each of the cables to prevent damage to the cables when the server is extended from the rack.

    cable management arm
  8. Connect the power cord to the AC power source.
    WARNING: To reduce the risk of electric shock or damage to the equipment:
    • Do not disable the power cord grounding plug. The grounding plug is an important safety feature.
    • Plug the power cord into a grounded (earthed) electrical outlet that is easily accessible at all times.
    • To disconnect power to the equipment, unplug the power cord from the power supply.
    • Do not route the power cord where it can be walked on or pinched by items placed against it. Pay particular attention to the plug, electrical outlet, and the point where the cord extends from the server.