Prerequisites
Before you perform this procedure, make sure that you have the following items available:
Procedure
-
If installed,
remove the front bezel.
-
Power down the server.
-
Remove all power:
- Disconnect each power cord from the power source.
- Disconnect each power cord from the server.
-
Remove the server from the rack.
-
Remove the inner rail to loose side screws on the redundant power supply cage.
-
Remove the access panel.
-
Remove the air baffle.
-
Remove all fans.
-
Disconnect all cables from system board.
-
Remove the power supply.
-
If installed, remove one of the following:
-
If installed,
remove the redundant power supply cage.
-
Remove the primary riser cage.
-
Remove the Media Module.
-
Remove the energy pack holder.
-
Remove the DIMM guard.
-
Remove all DIMMs.
-
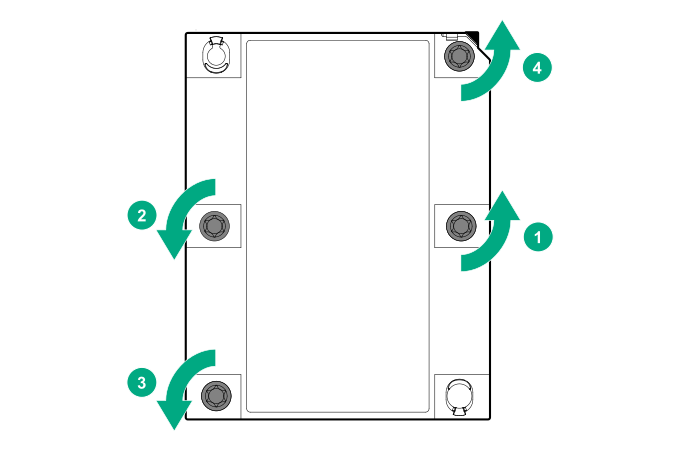
Observe the following cautions.
CAUTION: Be sure to loosen each heatsink nut in the order indicated. Otherwise, damage might occur to the heatsink or processor.
CAUTION: Install the processor heatsink assembly as soon as possible after removing it. Do not leave the processor socket unpopulated for extended periods of time.
-
Remove the processor heatsink assembly:
- Allow the heatsink to cool.
- Loosen the heatsink nuts in the order specified by the label on the heatsink.
- Lift the processor heatsink assembly and move it away from the system board.
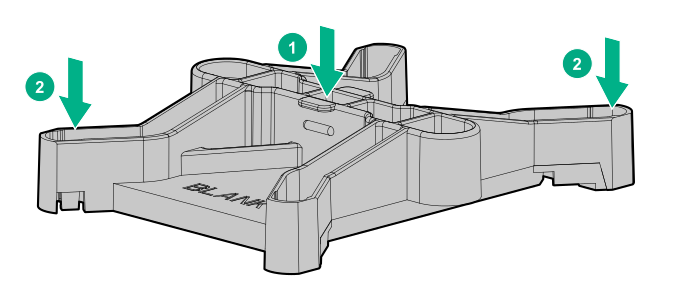
- Turn the assembly over and place it on a work surface with the processor facing up.
- Install the dust cover on each processor socket on the failed system board.
-
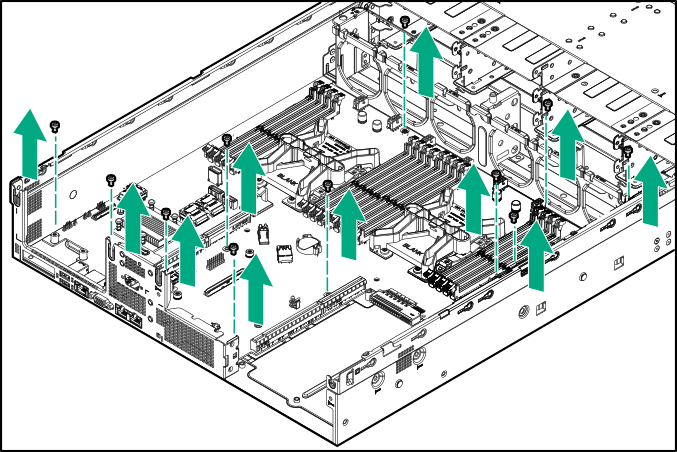
Remove the system board:
- Remove screws from system board.
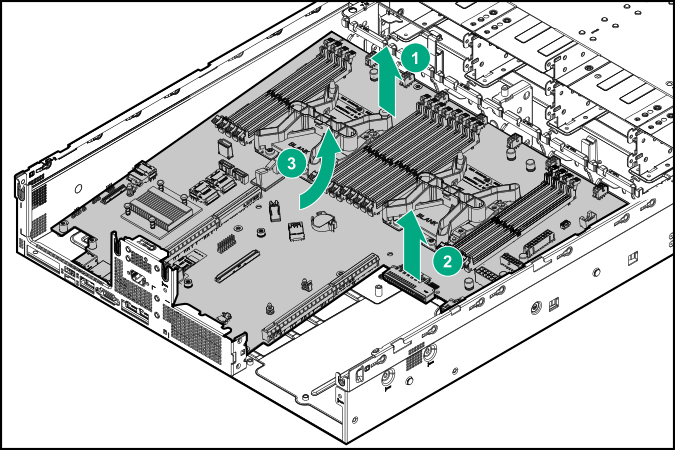
- Install the system board handle tool on the dust cover of processor 1 shown as the following illustration.
- Hold the handle tool to lift the system board
- Grasp the RPS connector area to lift the system board.
- When the front edge of system board is higher than the fan cage, remove the system board from the rear panel.
-
Remove the handle from the failed system board.