Replacing the system board
Prerequisites
Before you perform this procedure, make sure that you have the following items available:
T-15 Torx screwdriver
T-30 Torx screwdriver
System board handle tool
Processor-heatsink dust cover
Procedure
- Install the processor-heatsink dust cover on the spare system board.
-
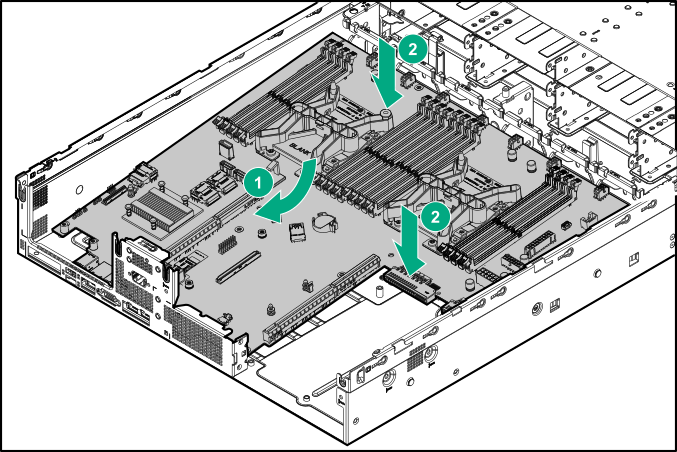
Install the system board:
- Install the system board handle tool on top-right corner of bolster of processor 1.

- Place the front edge of the system board on the chassis.
- Install the screws.
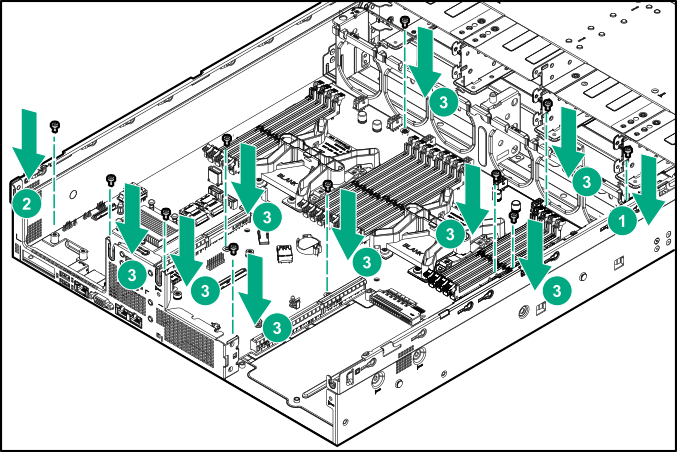
- Install the system board handle tool on top-right corner of bolster of processor 1.
-
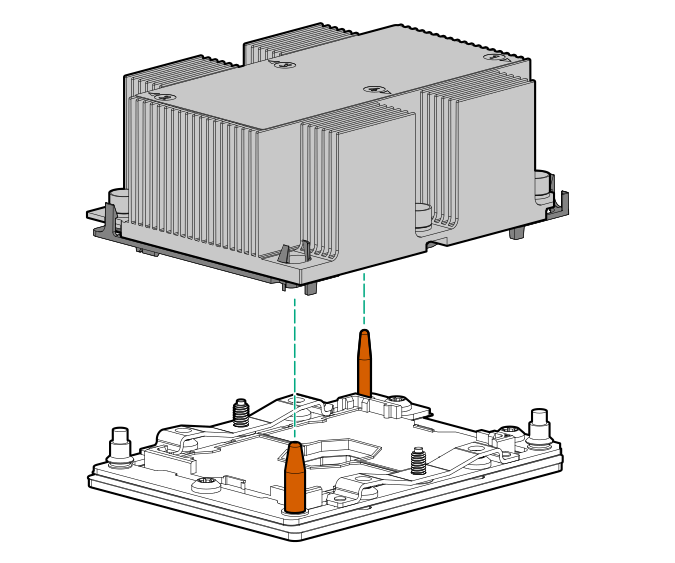
Install the processor heatsink assembly:
- Align the processor heatsink assembly with the heatsink alignment posts and gently lower it down until it sits evenly on the socket.
The heatsink alignment posts are keyed. The processor will only install one way.
A standard heatsink is shown, your heatsink might look different.
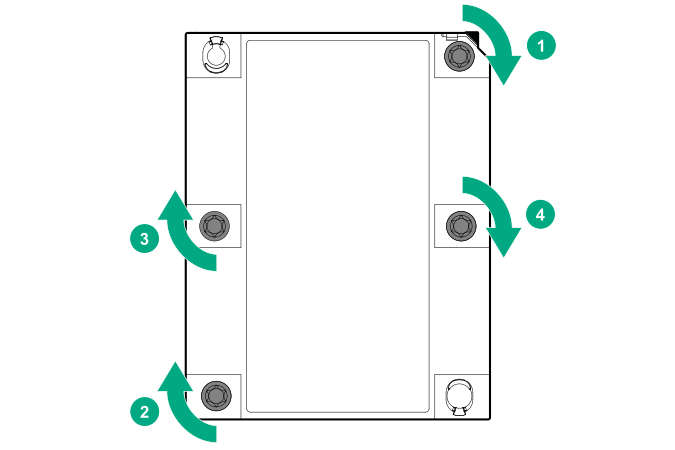
 CAUTION: Be sure to tighten each heatsink nut fully in the order indicated. Otherwise, boot failure or intermittent shutdowns might occur.
 - Using a T-30 Torx screwdriver, tighten the nuts until they stop.
- Align the processor heatsink assembly with the heatsink alignment posts and gently lower it down until it sits evenly on the socket.
- Install all components removed from the failed system board.
- Connect all cables.
- Install the access panel.
- Install the server into the rack.
- Connect all peripheral cables to the server.
- Connect each power cord to the server.
- Connect each power cord to the power source.
- Power up the server.
- Ensure all firmware, including option cards and embedded devices, is updated to the same versions to ensure that the latest drivers are being used.
- Re-enter any Secure Boot Keys that were previously added in the Secure Boot configuration.
- If Intel Xeon Gold 6244 Processors are installed, enable the enhanced cooling function.
- If removed, install the front bezel.
- Re-enter the server serial number and product ID.