Installing the six-bay SFF rear drive cage (SAS, SATA)
IMPORTANT:
Hewlett Packard Enterprise recommends installing at least one drive in the rear drive cage. Populate drive bays based on the drive numbering sequence. Start from the drive bay with the lowest device number (Drive numbering).
This drive cage option supports SAS or SATA drives. These drives are assigned the drive numbers 49–54 (Drive numbering). The six-bay SFF rear drive cage connects only to PCIe slot 2.
Prerequisites
Before you perform this procedure, make sure that you have the following items available:
The components included with the hardware kit
Torx T-15 screwdriver
Procedure
- Power down the system (Power down the system).
-
Remove all power:
- Disconnect each power cord from the power source.
- Disconnect each power cord from the system.
- Remove the system from the rack (Remove the system from the rack).
- Place the system on a flat, level work surface.
- Remove the access panel (Remove the access panel).
- Remove the air baffle (Remove the air baffle).
- Remove the rear option blank (Remove the rear drive cage blank).
-
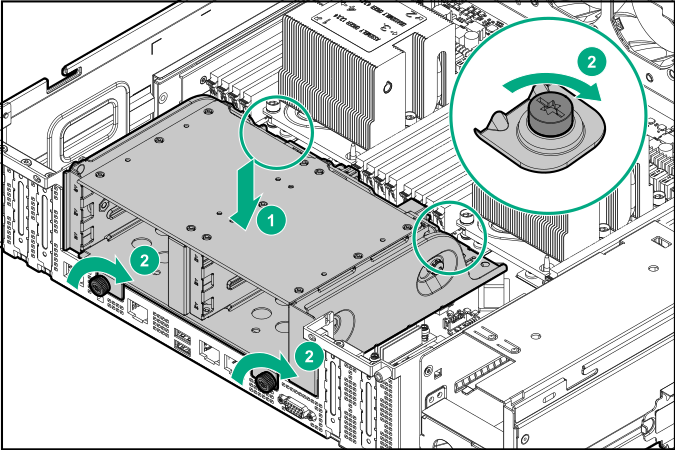
Install the six-bay rear drive cage.
- Connect the cables to the PCIe in slot 2.
- Install the air baffle (Install the air baffle ).
- Install the access panel (Install the access panel).
- Install the system into the rack (Installing the system into the rack).
- Power up the system (Power up the system).