Removing a drive
Failure to observe this caution will result in improper airflow and insufficient cooling that can lead to thermal damage.
Do not operate the system with any of the front or rear drive cage bays empty. To maintain proper airflow and sufficient cooling, all drive bays in the front and rear cage must have a drive or a drive blank.
-
Depending on the type of drive in the cage, do one of the following:
Remove an LFF drive:
Determine the status of the drive from the low profile LFF drive LEDs (Low-profile LFF drive LED definitions).
Wait until the Online/Activity LED stops flashing.
To open the release lever, press the latch.
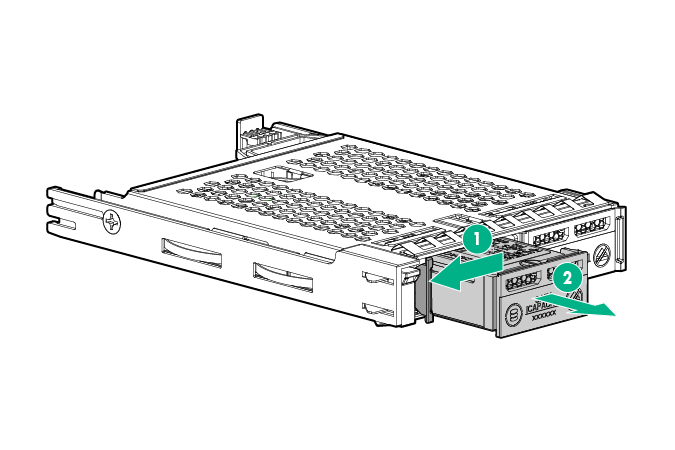
Pull the release lever to disengage the drive from the backplane, and then slide the drive out of the bay.
Remove an SFF drive:
Determine the status of the drive from the SFF LEDs (SFF drive components and LEDs).
Wait until the icon in the Do Not Remove button stops flashing and is no longer illuminated.
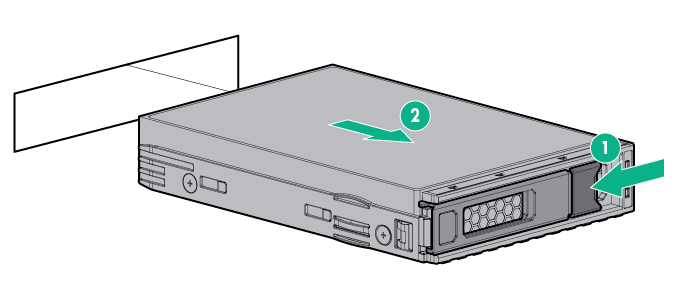
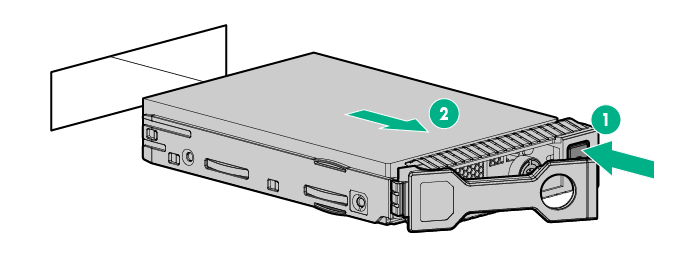
Press the Do Not Remove button to open the release lever.
Pull the release lever to disengage the drive from the backplane, and then slide the drive out of the bay.
Remove an NVMe drive (rear drive cage only):
Determine the status of the drive from the NVMe LEDs (NVMe drive components and LEDs).
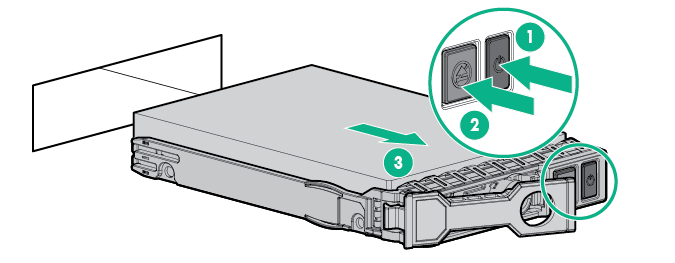
Press the power button.
The Do Not Remove button illuminates and flashes.
When the Do Not Remove button stops flashing and the icon on the button is no longer illuminated, press the Do Not Remove button to release the release lever.
Pull the release lever to disengage the drive from the backplane, and slide the drive out of the drive bay.
Remove a uFF drive
Observe the LED status of the drive and determine if it can be removed (SFF flash adapter components and LED definitions).
Remove the drive.