Installing a DC hot-plug power supply
If you are not using an input power cord option, the power supply cabling must be made in consultation with a licensed electrician and be compliant with local code.
If you are replacing the factory installed ground lug, use the KST RNB5-5 crimp terminal ring or equivalent. Use an M5-0.80 x 8 screw to attach the ground lug to the power supply.
To reduce the risk of electric shock, fire, and damage to the equipment, you must install this product in accordance with the following guidelines:
This power supply is intended only for installation in Hewlett Packard Enterprise systems located in a restricted access location.
- This power supply is not intended for direct connection to the DC supply branch circuit. Only connect this power supply to a power distribution unit (PDU) that provides an independent overcurrent-protected output for each DC power supply. Each output overcurrent-protected device in the PDU must be suitable for interrupting fault current available from the DC power source and must be rated no more than 40A.
The PDU output must have a shutoff switch or a circuit breaker to disconnect power for each power supply. To completely remove power from the power supply, disconnect power at the PDU. The end product may have multiple power supplies. To remove all power from the product, disconnect the power for each power supply.
In accordance with applicable national requirements for Information Technology Equipment and Telecommunications Equipment, this power supply only connects to DC power sources that are classified as SELV or TNV. Generally, these requirements are based on the International Standard for Information Technology Equipment, IEC 60950-1. In accordance with local and regional electric codes and regulations, the DC source must have one pole (Neutral/Return) reliably connected to earth ground.
Connect the power supply ground screw located on the front of the power supply to a suitable ground (earth) terminal. In accordance with local and regional electric codes and regulations, this terminal must be connected to a suitable building ground (earth) terminal. Do not rely on the rack or cabinet chassis to provide adequate ground (earth) continuity.
-
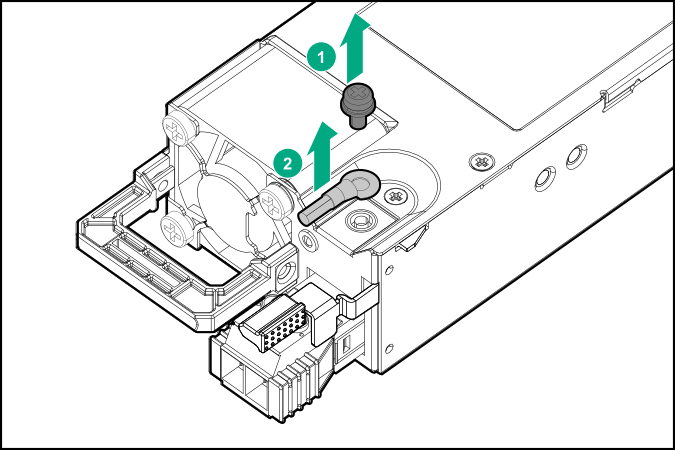
Remove the power supply blank (Rear panel components).
-
Remove the ring tongue.
-
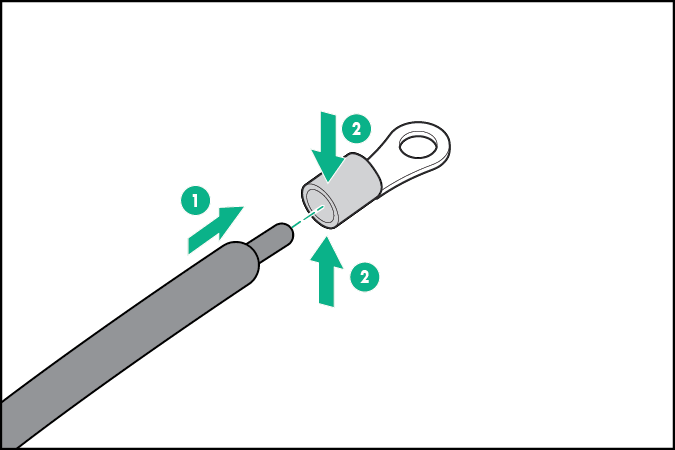
Crimp the ring tongue to the ground cable from the -48 V DC power source.
-
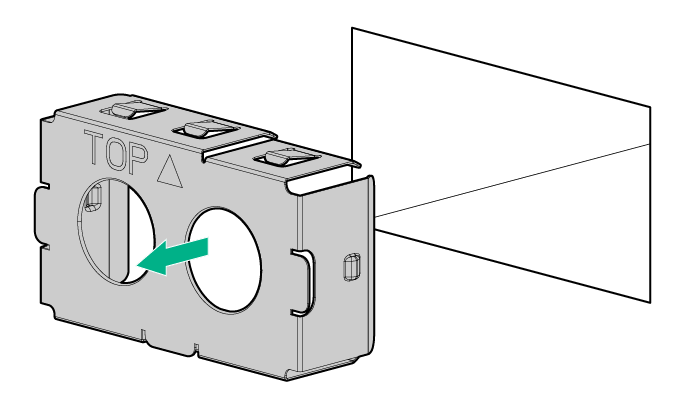
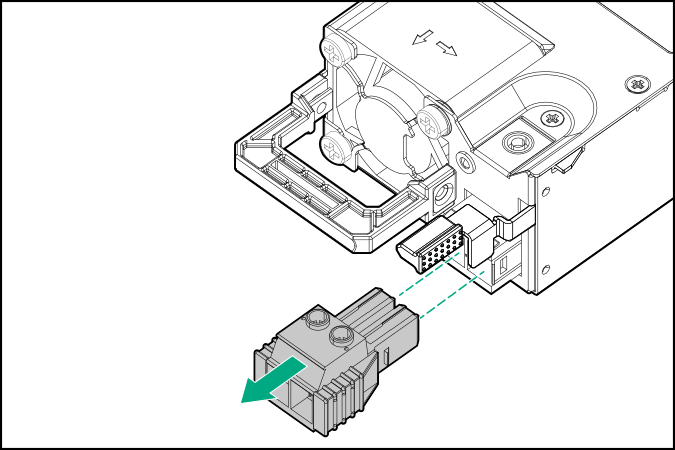
Remove the terminal block connector.
-
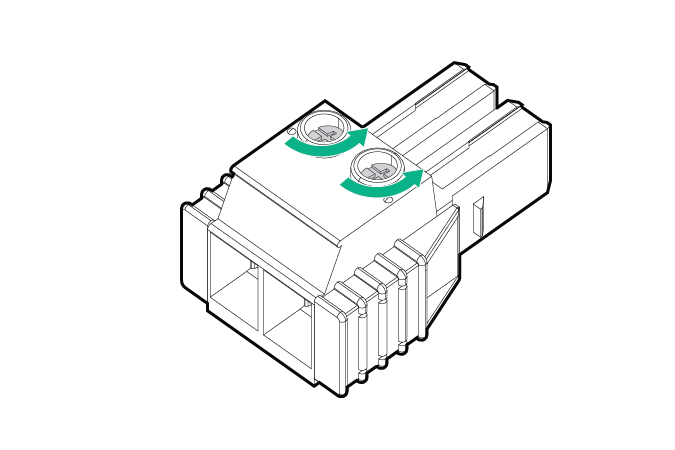
Loosen the screws on the terminal block connector.
-
Attach the ground (earthed) wire to the ground screw and washer and tighten to 1.47 N m (13 lb-in) of torque. The ground wire must be connected before the -48 V wire and the return wire.
-
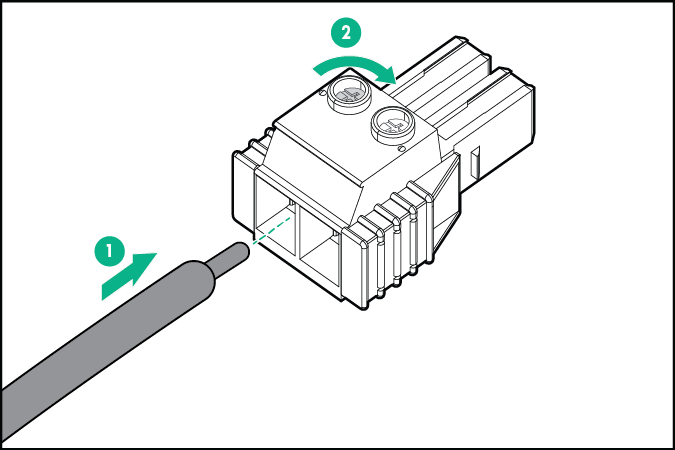
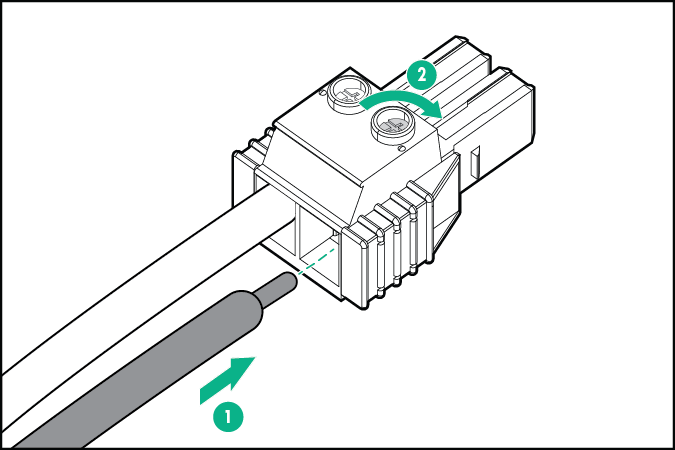
Insert the -48 V wire into the left side of the terminal block connector, and then tighten the screw to 1.3 N m (10 lb-in) of torque.
-
Insert the return wire into the right side of the connector, and then tighten the screw to 1.3 N m (10 lb-in) of torque.
-
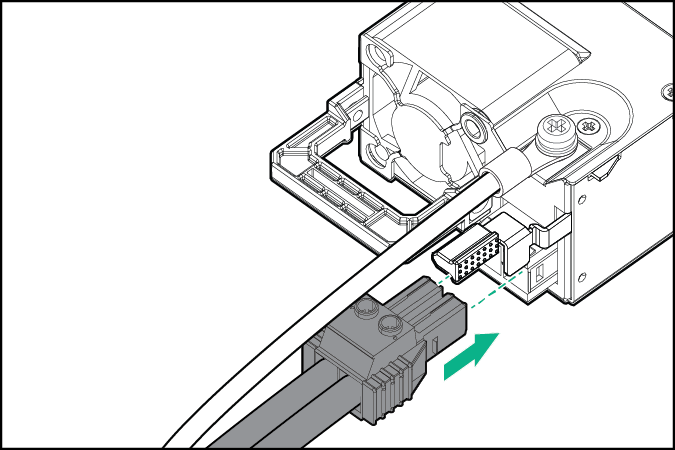
Install the terminal block connector in the power supply.
-
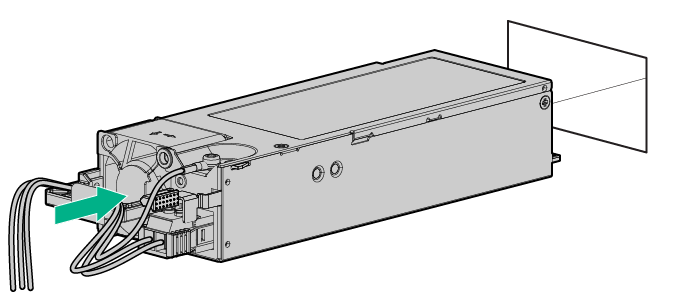
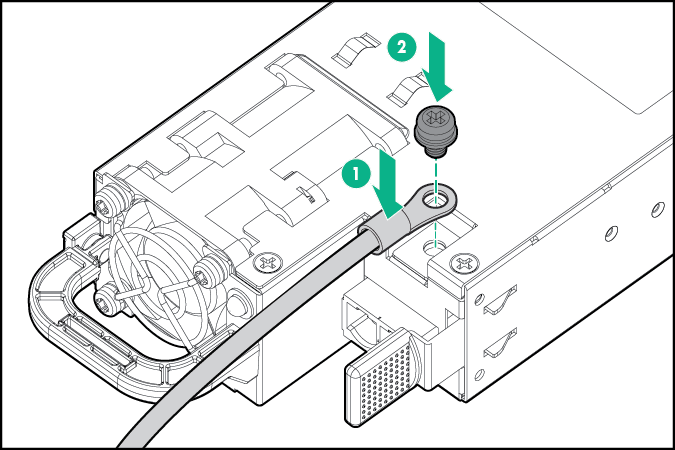
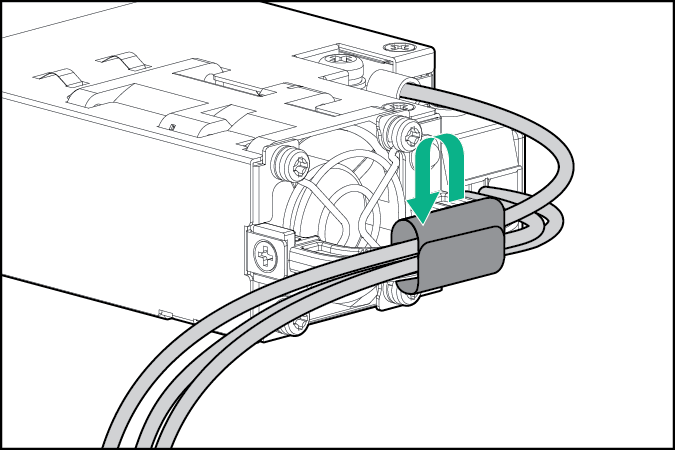
To prevent accidental power cord disconnection when sliding the
system in and out of the rack, secure the power cord, wires, and/or cables in the strain relief strap attached to the power supply handle:
- Secure the wires and cables with the strain relief strap. Roll the extra length of the strap around the power supply handle.
- Secure the wires and cables with the strain relief strap. Roll the extra length of the strap around the power supply handle.
-
Slide the power supply into the bay until it clicks into place.