Installing the HPE Smart Storage Battery
CAUTION:
In systems that use external data storage, be sure that the system is the first unit to be powered down and the last to be powered back up. Taking this precaution ensures that the system does not erroneously mark the external drives as failed when the system is powered up.
NOTE: System ROM and firmware messages might display "energy pack" in place of "Smart Storage Battery." Energy pack refers to both
HPE Smart Storage batteries and
HPE Smart Storage Hybrid capacitors.
Procedure
-
Secure the HPE Smart Storage Battery cable under the air baffle clips, and then connect the cable to the system board.

IMPORTANT:To enable SmartCache or CacheCade in a P-class type-p Smart Array controller, you must:Connect the controller backup power cable to the controller backup power connector on the system or riser board.
Connect the energy pack cable to the energy pack connector on the system board.
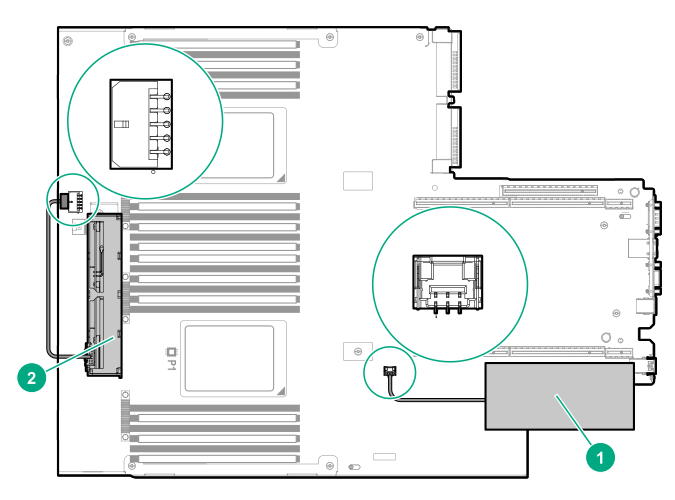
Item Description1 1 Type-p Smart Array controller connected to the controller backup power connector 2 Energy pack connected to the energy pack connector 1Your server might appear different.