Remove a rear drive cage
WARNING: To reduce the risk of personal injury from hot surfaces, allow the drives and the internal system components to cool before touching them.
CAUTION: To prevent damage to electrical components, take the appropriate anti-static precautions before beginning any installation, removal, or replacement procedure. Improper grounding can cause electrostatic discharge.
Prerequisites
Before you perform this procedure, make sure that you have the components included with the hardware kit.
Procedure
-
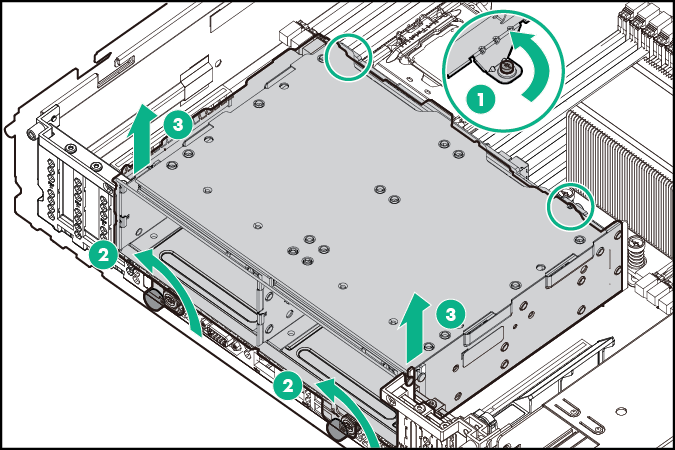
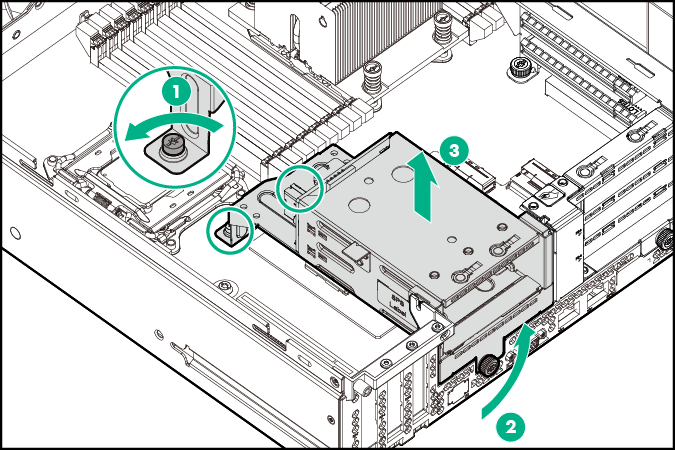
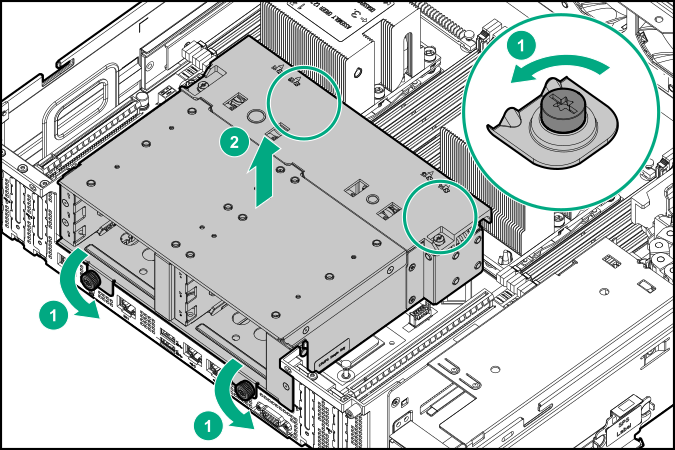
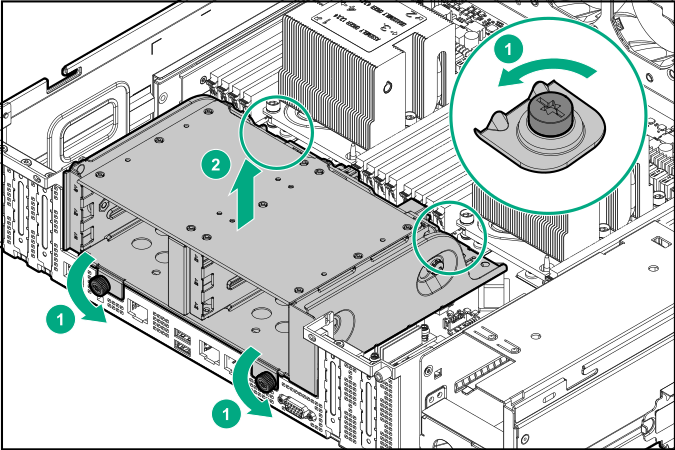
Remove the rear drive cage:
Four-bay LFF hot-plug rear drive cage removal
Two-bay SFF hot-plug rear drive cage removal
Six-bay SFF NVMe drive cage removal
Six-bay SFF rear drive cage (SAS or SATA)
To replace the component, reverse the removal procedure.