Procedure
-
Remove the front bezel.
-
Power down the server.
-
Remove all power:
- Disconnect each power cord from the power source.
- Disconnect each power cord from the
server.
-
Disconnect all peripheral cables from the server.
-
Do one of the following:
-
Remove the access panel.
-
Remove the air baffle.
-
If you are installing a DIMM for processor 2, and the fan cage is present,
remove the fan cage.
-
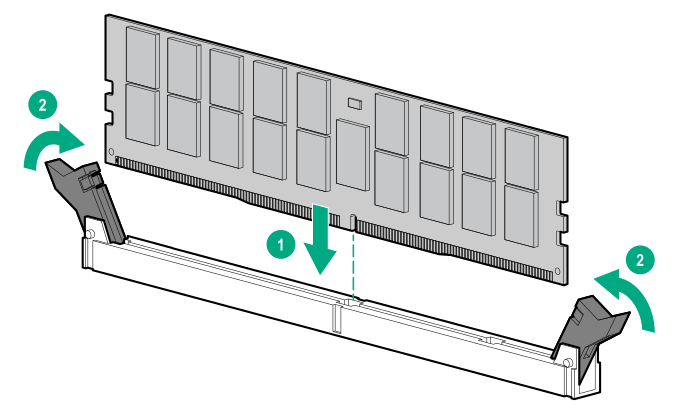
Open the DIMM slot latches.
-
Align the notch on the bottom edge of the DIMM with the keyed surface of the DIMM slot, and then fully press the DIMM into the slot until the latches snap back into place.
The DIMM slots are structured to ensure proper installation. If you try to insert a DIMM but it does not fit easily into the slot, you might have positioned it incorrectly. Reverse the orientation of the DIMM and insert it again
-
If the fan cage was removed, do the following:
- Make sure that all the system cables that are routed through the front cable channel are properly secured in the metal cable tabs. This is done to prevent system damage due to cables being inadvertently caught under the fan cage.
- Install the fan cage.
-
Install the air baffle.
-
Install the access panel.
-
Do one of the following:
-
Connect all peripheral cables to the server.
-
Connect each power cord to the server.
-
Connect each power cord to the power source.
-
Power up the server.
-
Install the front bezel.
The installation is complete.
After installing the DIMMs, use the
to configure the memory settings.