Installing a SATA optical drive

Prerequisites

Before you perform this procedure, make sure that you have the following items available:

  • Optical drive cage option
    • Optical drive

    • Optical drive bracket

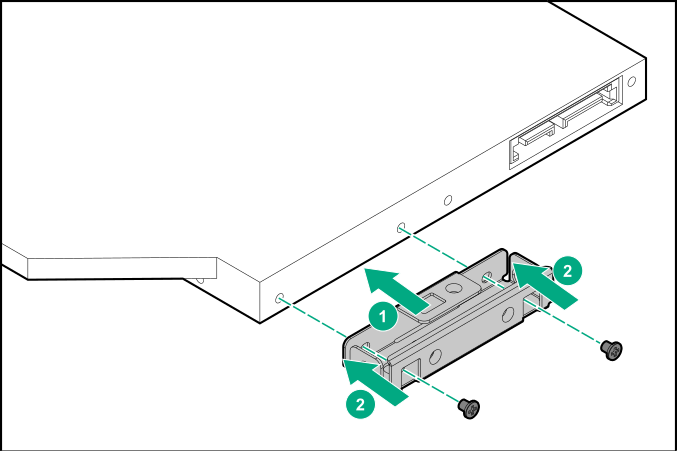
    • Optical drive bracket screws (2)

    • The SATA-power cable that ships with the drive option will not be used in this server

  • T-15 Torx screwdriver

  • Phillips No. 1 screwdriver

Procedure
  1. Remove the front bezel.
  2. Power down the server.
  3. Remove all power:
    1. Disconnect each power cord from the power source.
    2. Disconnect each power cord from the server.
  4. Disconnect all peripheral cables from the server.
  5. Do one of the following:
  6. Remove the access panel.
  7. Remove the air baffle.
  8. If installed, remove the fan cage.
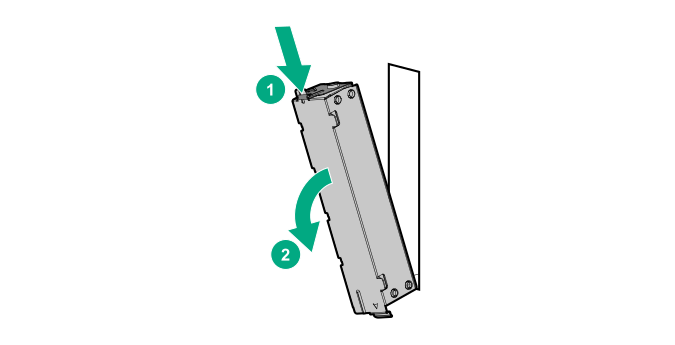
  9. While pressing the latch on the optical drive blank, pull out the blank from the bay.

    Retain the blank for future use.


    Removing the optical drive blank
  10. Install the optical drive bracket.

    Installing the optical drive bracket
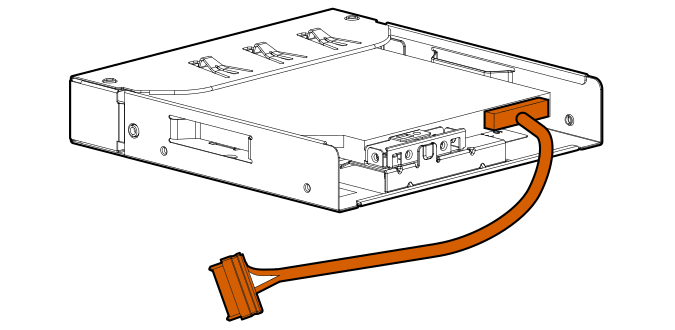
  11. Install the optical drive in the drive cage.

    Installing the optical drive in the drive cage
  12. Observe the guidelines for managing cables.
  13. Connect the SATA-power cable to the optical drive.
    Connecting the SATA-power cable to the optical drive
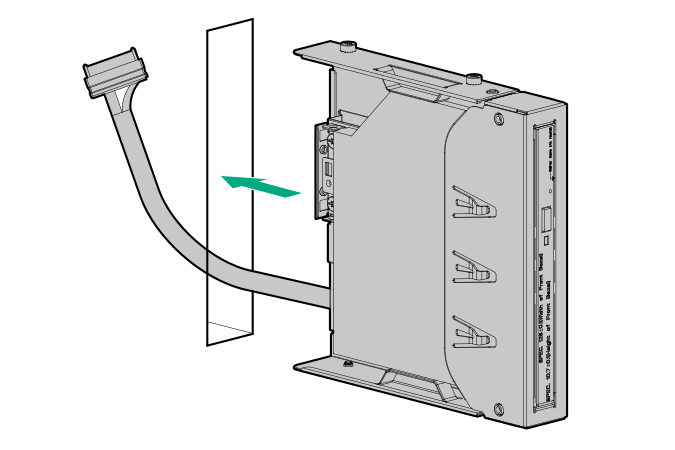
  14. Slide the optical drive assembly with the SATA-power cable into the optical drive bay until it clicks into place.

    Installing the optical drive in the optical drive bay
  15. Connect the optical drive power-SATA cable to the system board.
  16. If the fan cage was removed, do the following:
    1. Make sure that all the system cables that are routed through the front cable channel are properly secured in the metal cable tabs. This is done to prevent system damage due to cables being inadvertently caught under the fan cage.
    2. Install the fan cage.
  17. Install the air baffle.
  18. Install the access panel.
  19. Do one of the following:
  20. Connect all peripheral cables to the server.
  21. Connect each power cord to the server.
  22. Connect each power cord to the power source.
  23. Power up the server.
  24. Install the front bezel.

The installation is complete.