Remove the non-hot-plug power supply
Prerequisites
Before you perform this procedure, make sure that you have a T-10 Torx screwdriver available.
Procedure
-
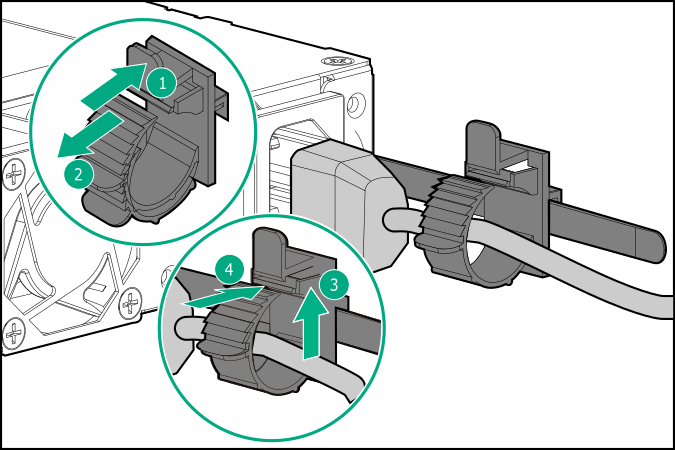
Release the power cord from the strain relief clip.
CAUTION: The snap-in latch of the energy pack holder is flexible. However, to avoid damaging this latch, do not apply too much pressure on this latch when removing or installing the energy pack from the chassis.
-
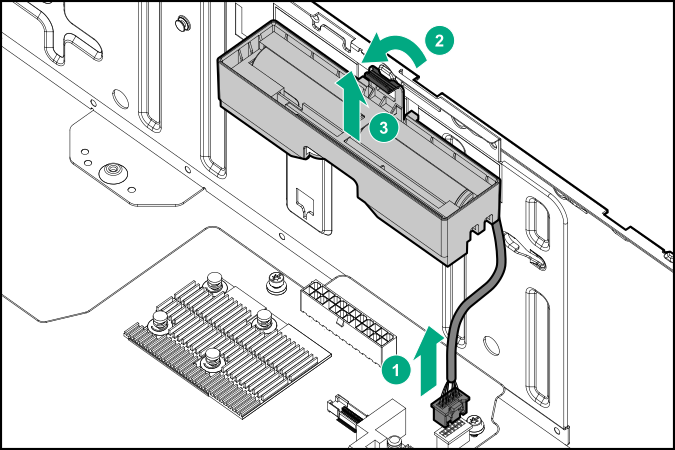
Remove the energy pack holder:
- While carefully holding the snap-in latch in the open position, slide the energy pack holder up to disengage it from the chassis.
- While carefully holding the snap-in latch in the open position, slide the energy pack holder up to disengage it from the chassis.
-
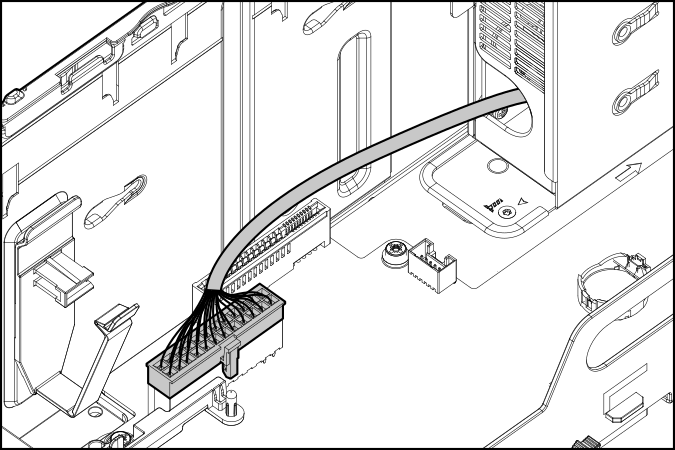
Disconnect the non-hot-plug power supply cable.
-
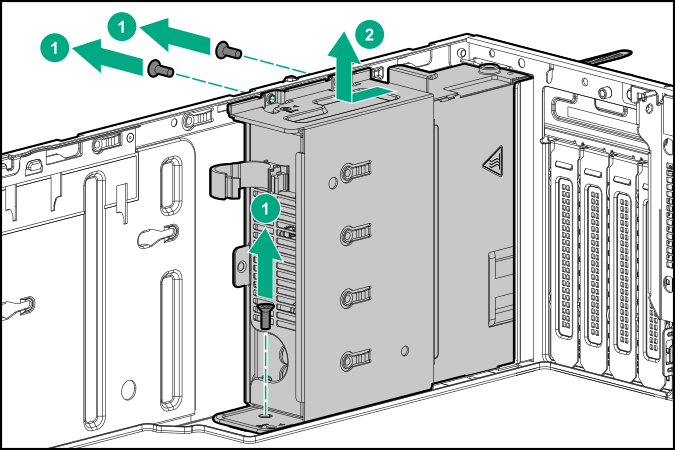
Remove the non-hot-plug power supply.