Install the RPS enablement option
Prerequisites
Before you perform this procedure, make sure that you have the following items available:
Redundant power supply enablement option
T-10 Torx screwdriver
Procedure
-
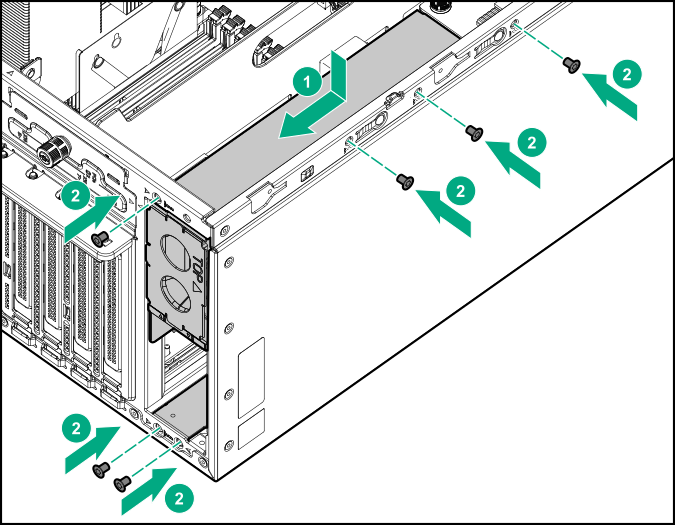
Install the redundant power supply cage:
- Mount the cage on the chassis.
- Secure the RPS cage with the screws kept from the removed non-hot-plug power supply.
-
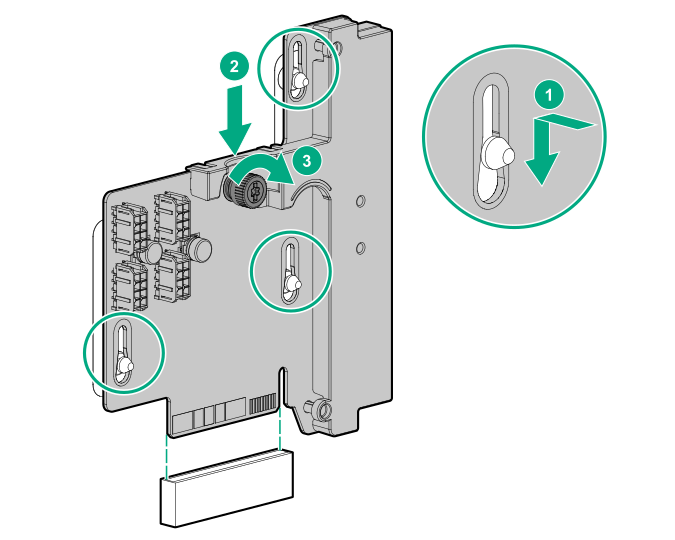
Install the power distribution board:
- Align the notches on the board with the pins on the chassis.
- Slide the board down to engage it fully with its connector.
- Tighten the board thumbscrew.
-
Install the energy pack holder:
- Insert the holder tabs into their corresponding chassis slots, and then slide the holder down.
- If the energy pack cable was disconnected, connect it back.

The installation is complete.