Heatsink
WARNING: To reduce the risk of personal injury from hot surfaces, allow the drives and the internal system components to cool before touching them.
CAUTION: To avoid damage to the processor and system board, only authorized personnel should attempt to replace or install the processor in this
node
.
CAUTION: To prevent possible
node
malfunction and damage to the equipment, multiprocessor configurations must contain processors with the same part number.
CAUTION: The heatsink thermal interface media is not reusable and must be replaced if the heatsink is removed from the processor after it has been installed.
IMPORTANT: Processor socket 1 must be populated at all times or the
node
does not function.
- Power down the node.
- Disconnect all peripheral cables from the node .
- Remove the node from the chassis.
- Place the node on a flat, level surface.
- In a 2U node, do one of the following:
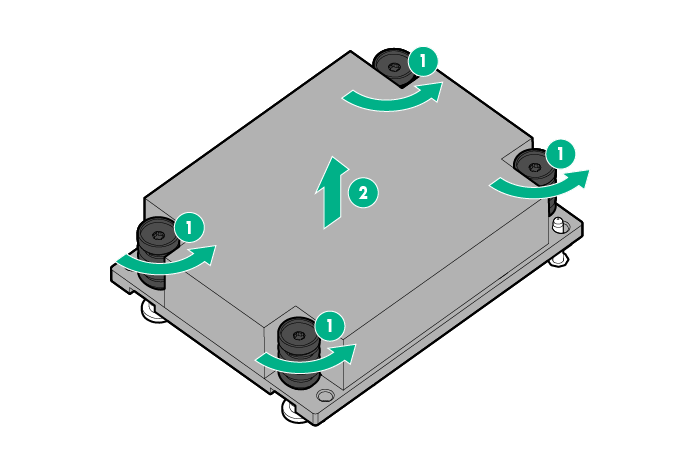
- Remove the air baffle.
- Remove the heatsink.
To replace the component:
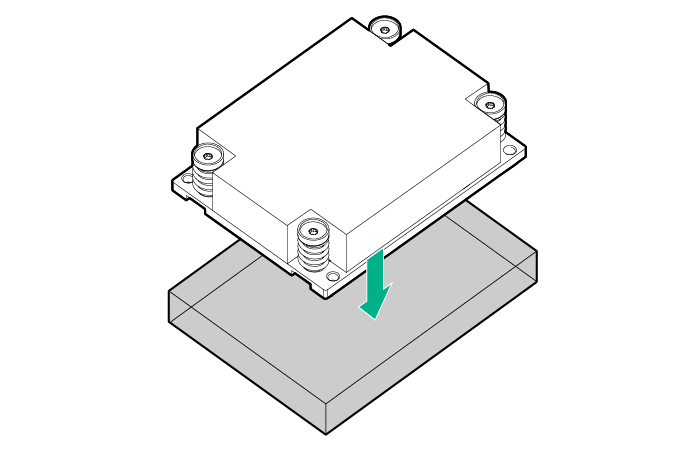
- Clean the old thermal grease from the processor with the alcohol swab. Allow the alcohol to evaporate before continuing.
- Remove the thermal interface protective cover from the heatsink.
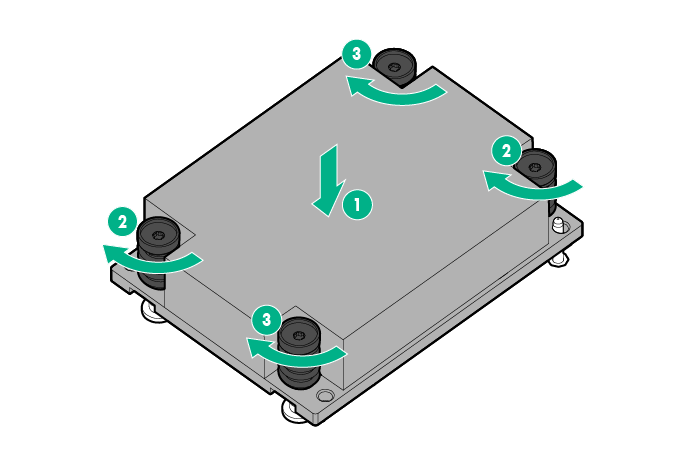
 CAUTION: Heatsink retaining screws should be tightened in diagonally opposite pairs (in an "X" pattern).
 - Install the heatsink:
- Position the heatsink on the processor backplate.
- Tighten one pair of diagonally opposite screws halfway, and then tighten the other pair of screws.
- Finish the installation by completely tightening the screws in the same sequence.
- Install the air baffle.
- Install any removed PCI riser cage assemblies.
- Install the node into the chassis.
- Connect all peripheral cables to the node .
- Power up the node .