Remove the chassis access panel
Procedure
- Power down all nodes.
-
Disconnect all peripheral cables from the nodes and chassis.
WARNING: The chassis is very heavy. To reduce the risk of personal injury or damage to the equipment:
- Observe local occupational health and safety requirements and guidelines for manual material handling.
- Remove all installed components from the chassis before installing or moving the chassis.
- Use caution and get help to lift and stabilize the chassis during installation or removal, especially when the chassis is not fastened to the rack.
CAUTION: Before installing the chassis into the rack or removing the chassis from the rack, Hewlett Packard Enterprise recommends removing the nodes, the drives, and the power supplies. Because a fully populated chassis is heavy, removing these components facilitates moving the chassis. - Remove all nodes from the chassis.
- If installed, remove the security bezel.
- Remove all drives.
- If installed, remove the RCM module.
- Remove all power supplies.
- Remove the chassis from the rack.
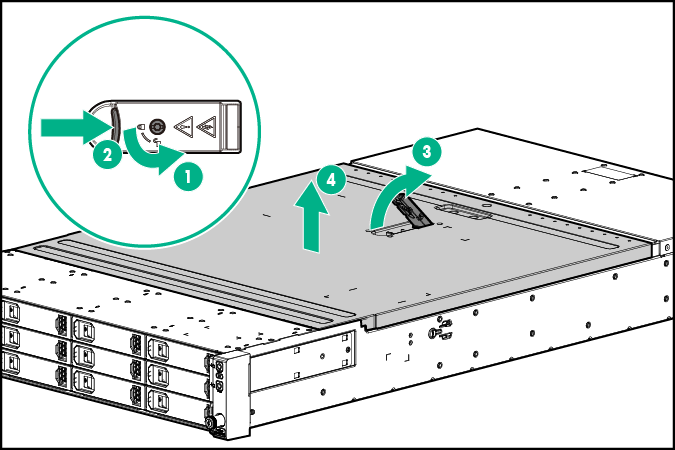
- Unlock the access panel latch using the T-15 Torx screwdriver and release the access panel latch.
- Slide the access panel back about 1.5 cm (0.5 in).
-
Lift and remove the access panel.