Chassis assembly
CAUTION: If replacing the HPE Apollo r2800 Chassis, verify the original drive bay mapping configuration to prevent possible data loss. For more information, see "Drive bay mapping for the HPE Apollo r2800 Chassis."
To remove the component:
Procedure
- Power down the system.
- Disconnect all peripheral cables from the nodes and chassis.
- Remove all nodes from the chassis.
- If installed, remove the security bezel.
- Remove all drives.
- If installed, remove the RCM module.
- Remove all power supplies.
- Remove the chassis from the rack.
To replace the component:
- Remove the Smart Storage Battery and fan modules from the failed chassis:
- Remove the access panel.
- If installed, remove the HPE Smart Storage Battery.
- Remove all fan modules.
- Install the Smart Storage Battery and fan modules into the new chassis:
- Remove the access panel.
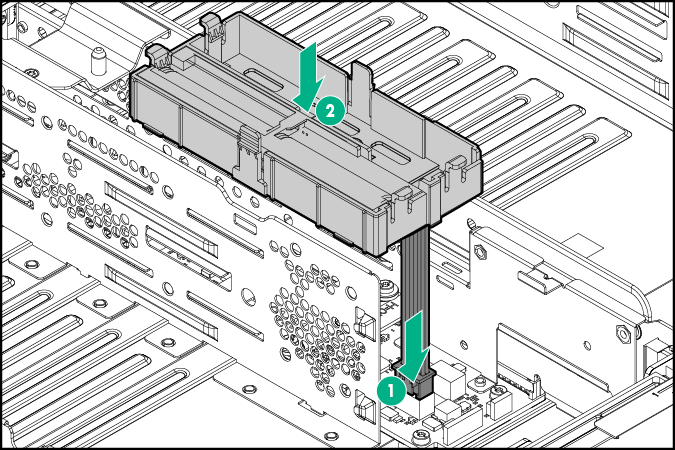
- Install the HPE Smart Storage Battery into the chassis.
IMPORTANT: Ensure that the battery cable is connected to the correct connector. For detailed cabling information, see "HPE Smart Storage Battery cabling."
- Install all fan modules and connect the fan cables to the power connectors.
- Install the access panel.
WARNING: Always use at least two people to lift the chassis into the rack. If the chassis is being loaded into the rack above chest level, a third person must assist with aligning the chassis with the rails while the other two people support the weight of the chassis .WARNING: The chassis is very heavy. To reduce the risk of personal injury or damage to the equipment:
- Observe local occupational health and safety requirements and guidelines for manual material handling.
- Remove all installed components from the chassis before installing or moving the chassis.
- Use caution and get help to lift and stabilize the chassis during installation or removal, especially when the chassis is not fastened to the rack.
WARNING: To avoid risk of personal injury or damage to the equipment, do not stack anything on top of rail-mounted equipment or use it as a work surface when extended from the rack.CAUTION: Always plan the rack installation so that the heaviest item is on the bottom of the rack. Install the heaviest item first, and continue to populate the rack from the bottom to the top. - Install the chassis into the rack and tighten the thumbscrews.
- Install all power supplies.
- If removed, install the RCM module.
- Install all drives.
- If removed, install the security bezel.
- Install all nodes into the chassis.
- Connect all peripheral cables to the nodes.
- Power up the nodes.