Power distribution board (PDB)
CAUTION: To prevent possible data loss when replacing the Apollo r2800 chassis PDB, verify the original drive bay mapping configuration. For more information, see "Drive bay mapping for the HPE Apollo r2800 Chassis."
Prerequisites
Before you perform this procedure, make sure you have the following items available:
T-15 Torx screwdriver
T-20 Torx screwdriver
Spudger or a small non-marring plastic flat-blade screwdriver
To remove the component:
- Power down the system.
- Disconnect all peripheral cables from the nodes and chassis.
- Remove all nodes from the chassis.
- If installed, remove the RCM module.
- Remove all power supplies.
- If installed, remove the security bezel.
- Remove all drives.
- Remove the chassis from the rack.
- Remove the access panel.
- If a Smart Storage Battery is installed, slightly pull up the battery holder from the chassis to access the battery cable connection underneath it, and then disconnect the Smart Storage Battery cable.

- Remove the PDB assembly.
Disconnect all cables from the PDB.
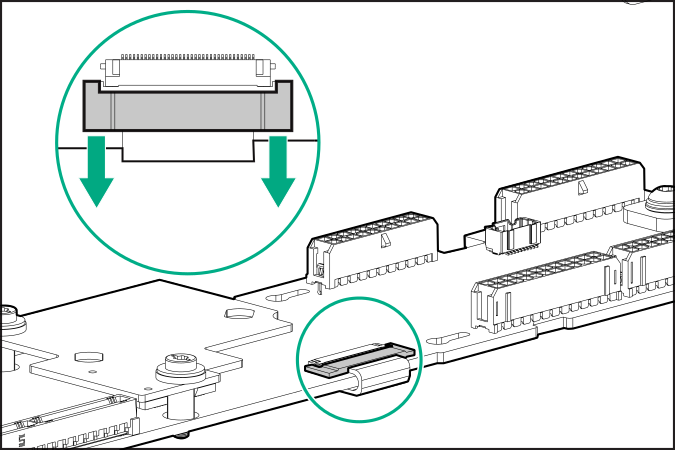
- Disconnect the PDB pass-through cable from the pass-through board.
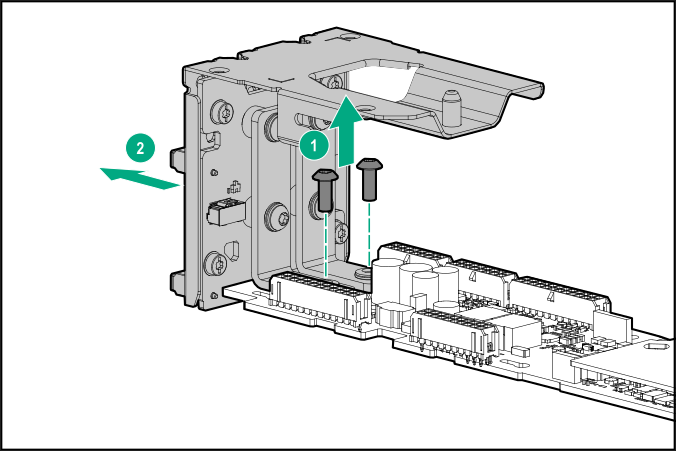
- Remove the PDB pass-through board assembly:
- Use a T-20 Torx screwdriver to remove the PDB pass-through board screws.
- Remove the PDB pass-through board assembly from the PDB.
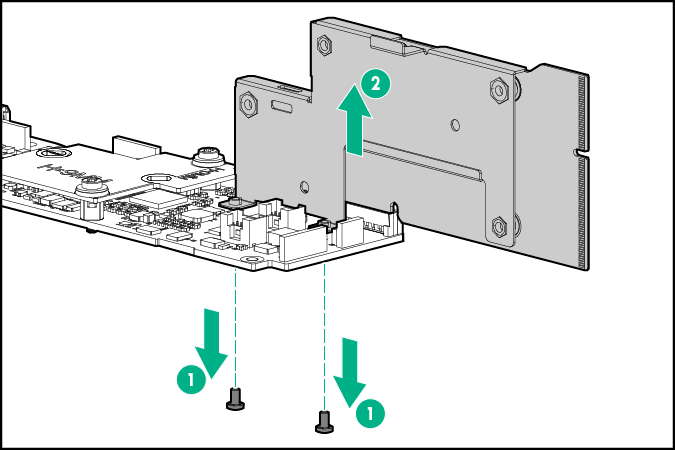
- Use a T-15 Torx screwdriver to remove the RPS link board screws.
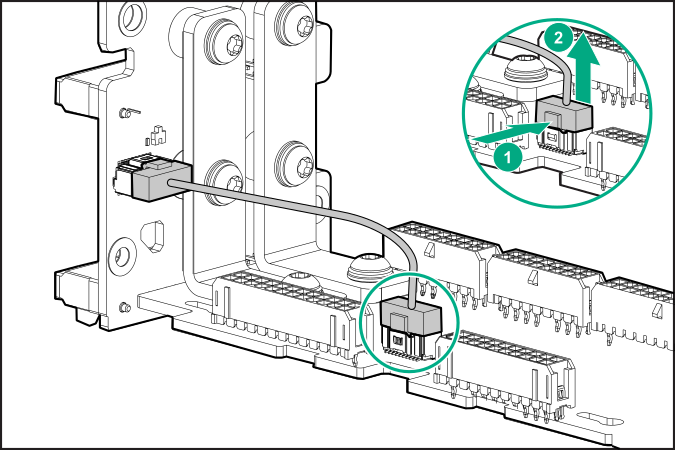
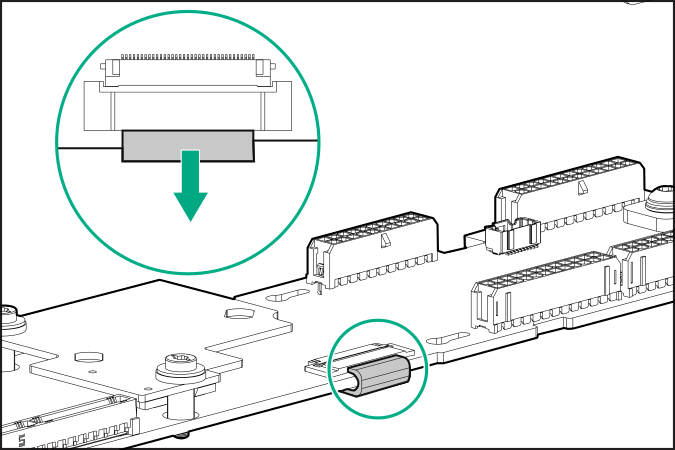
Remove the RCM 2.0 cable:
Use the pointed tip of a spudger or a small non-marring plastic flat-blade screwdriver to carefully push each side of the connector. You might need to alternately push from one side to the other to completely slide the connector out.
Disconnect the RCM 2.0 cable.
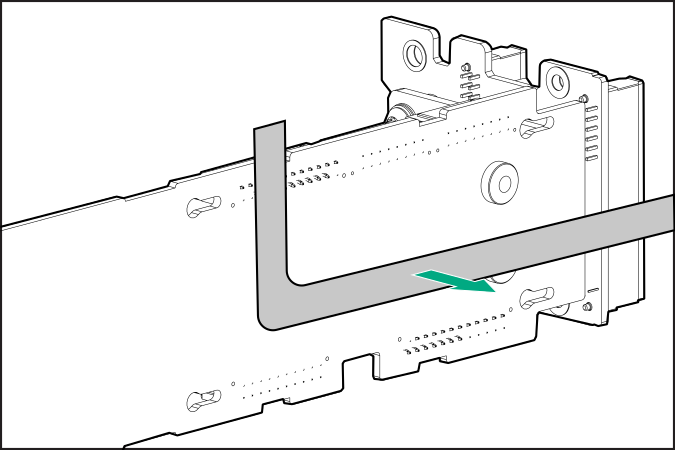
- Detach the RCM 2.0 cable from the underside of the PDB.
To replace the component, reverse the removal procedure.