Replacing Accelerator 1 in a three-slot riser cage assembly
Procedure
- Power down the node.
- Disconnect all peripheral cables from the node .
- Remove the node from the chassis.
- Place the node on a flat, level surface.
- Remove the three-slot riser cage assembly.
- Disconnect the accelerator power cable from the bayonet board.
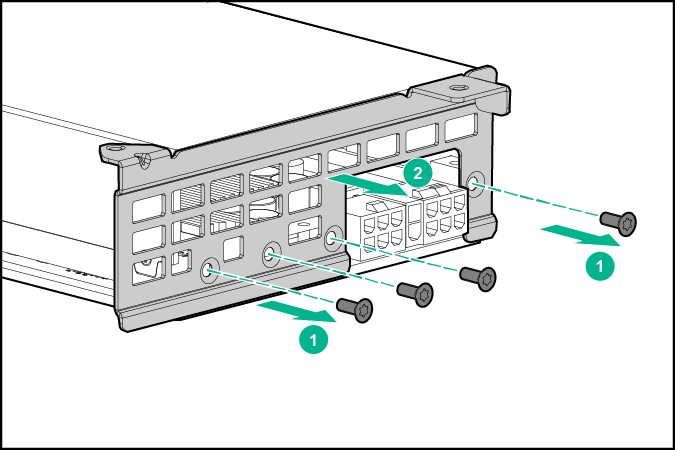
- Remove the riser cage bracket from the three-slot riser cage assembly.
- Disconnect all cables from the accelerators.
- Remove Accelerator 2 from the three-slot riser cage assembly.
- Remove Accelerator 1 from the three-slot riser cage assembly.
To replace the component:
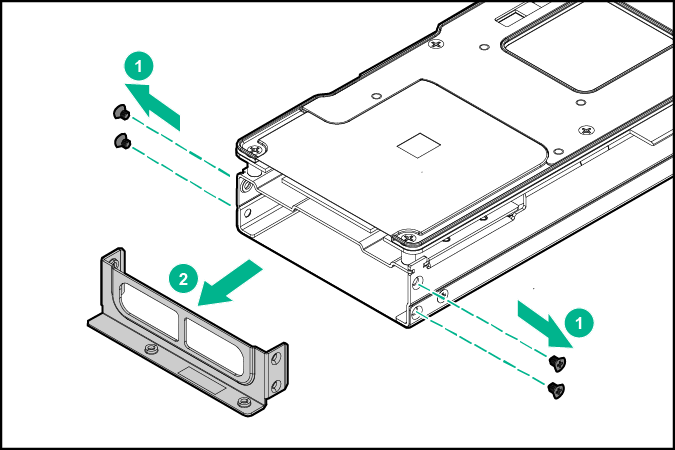
- If replacing a NVIDIA Tesla K40 GPU, remove the front support bracket. Keep this bracket and install it onto the new K40 GPU.
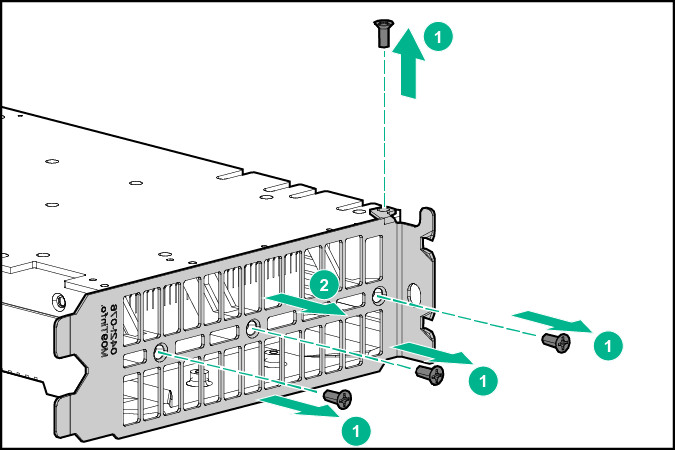
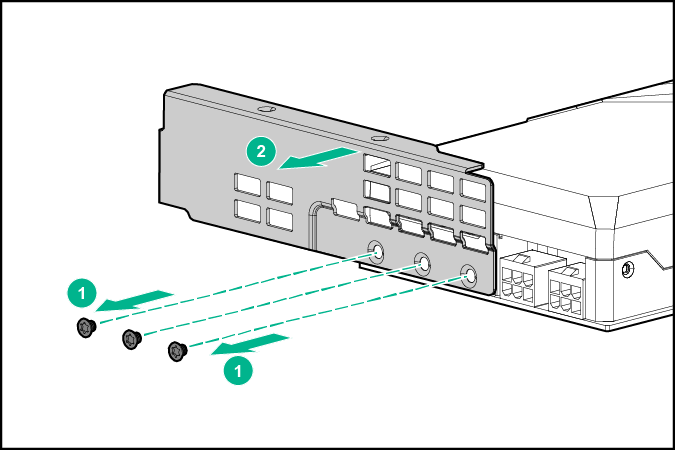
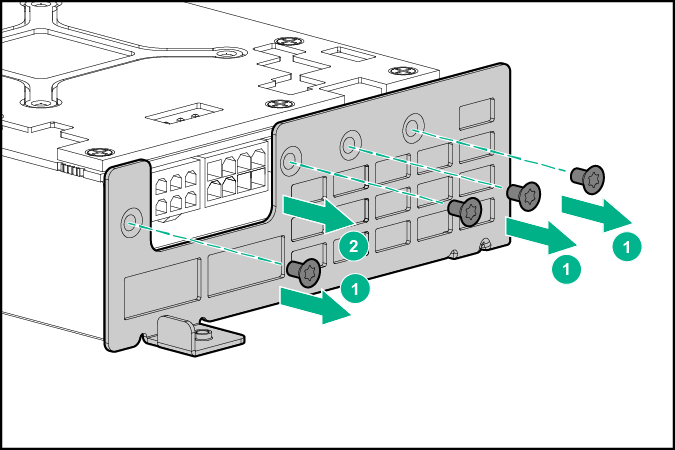
- Remove the rear support bracket for Accelerator 1.
IMPORTANT: Keep this bracket to install it onto the new accelerator.
- NVIDIA Tesla K40, K80, M60, M40, P40, or P100 GPU
- NVIDIA GRID K2 GPU
- Intel Xeon Phi Coprocessor 5110P
- AMD FirePro S9150 GPU
- AMD FirePro S7150 GPU
- NVIDIA Tesla K40, K80, M60, M40, P40, or P100 GPU
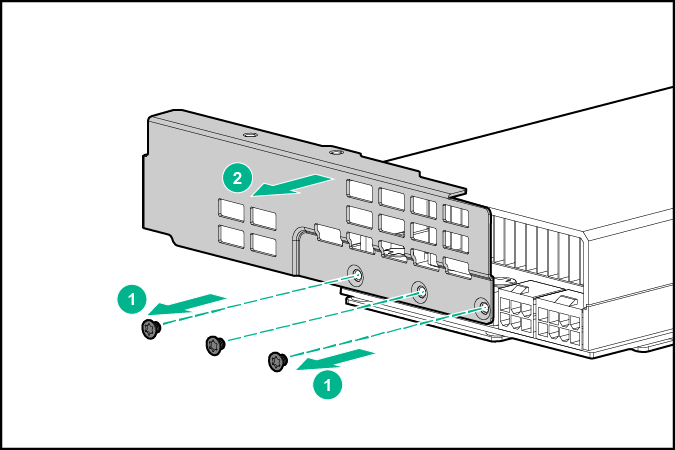
- Remove the existing rear support bracket from the new accelerator. Keep this bracket to install it onto the failed accelerator.
- Install the rear support bracket for Accelerator 1 onto the new accelerator.
- If replacing a NVIDIA Tesla K40 GPU, install the front support bracket for Accelerator 1 onto the new K40 GPU.
To replace the component, reverse the removal procedure.