Bezel ear
Prerequisites
Before you perform this procedure, make sure that you have the following items available:
T-15 Torx screwdriver
T-10 Torx screwdriver
To remove the component:
- Power down the system.
- Disconnect all peripheral cables from the nodes and chassis.
- Remove all nodes from the chassis.
- If installed, remove the RCM module.
- Remove all power supplies.
- If installed, remove the security bezel.
- Remove all drives.
- Remove the chassis from the rack.
- Remove the access panel.
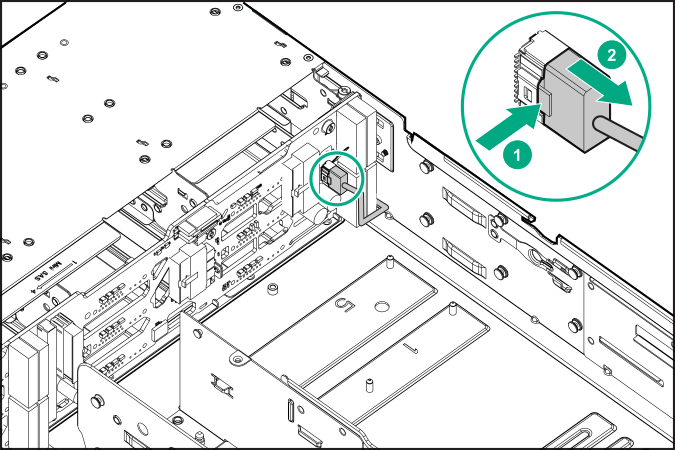
- Disconnect the front I/O cables from the drive backplane.
Right front I/O cable
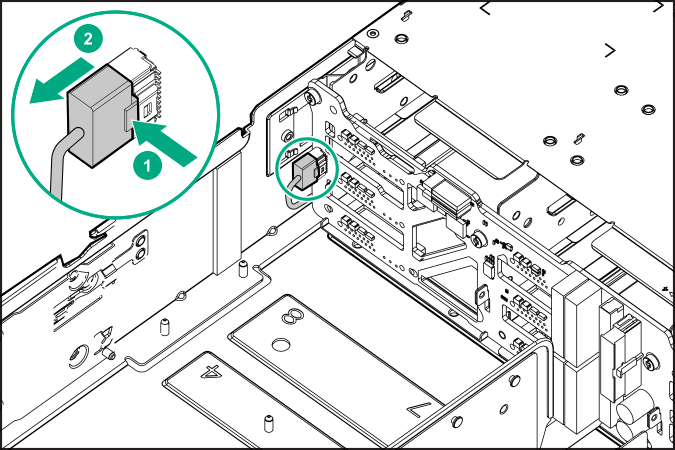
Left front I/O cable
- Remove the front I/O cable cover.
- Right front I/O cable cover

- Left front I/O cable cover
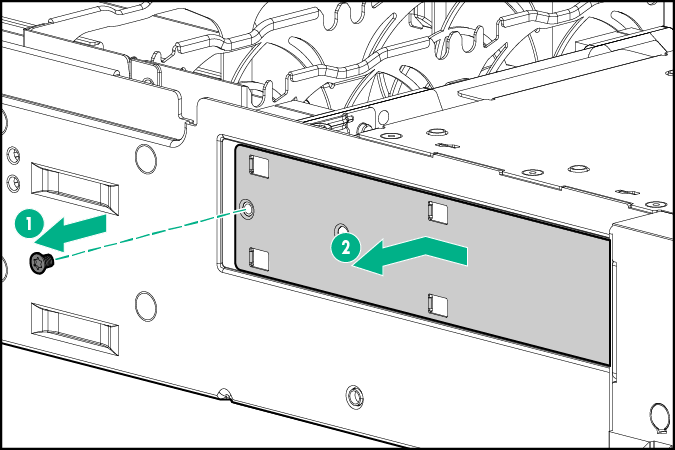
- Right front I/O cable cover
- Remove the bezel ear screws.
- Right bezel ear
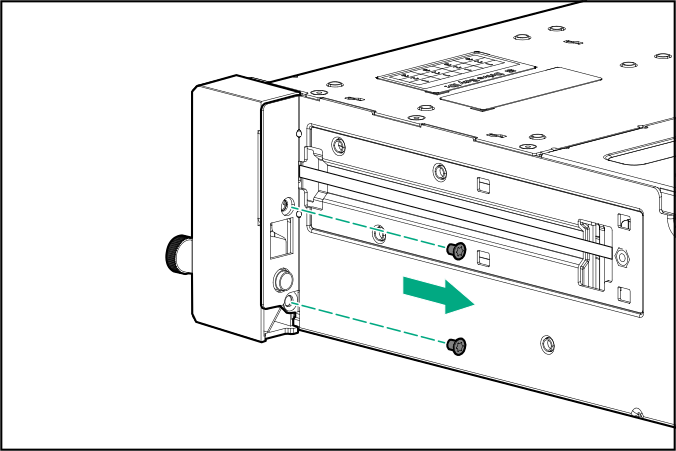
- Left bezel ear
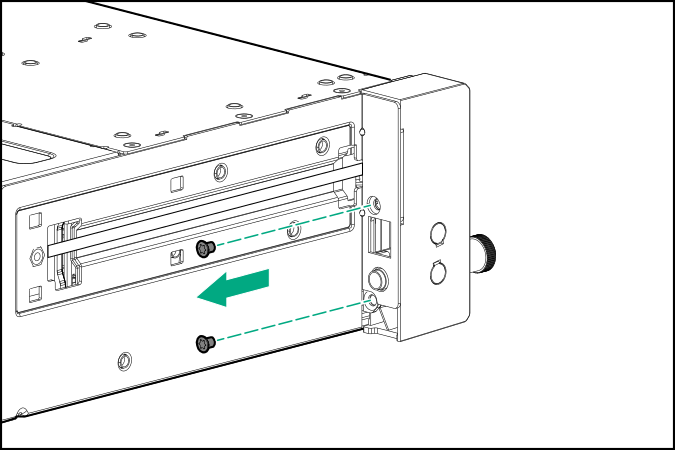
- Right bezel ear
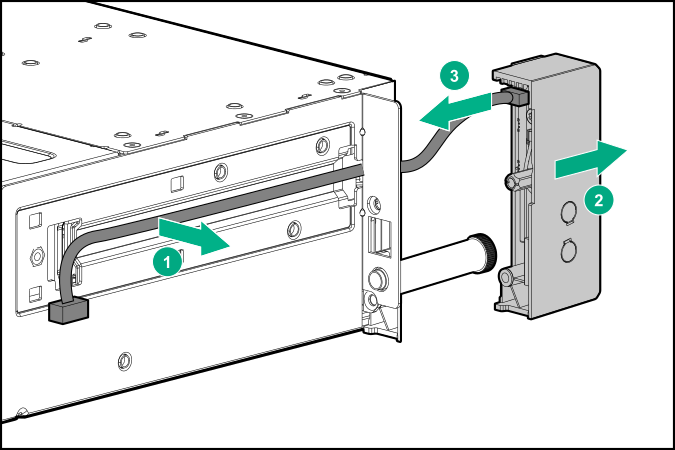
- Remove the bezel ear:
Pull the front I/O cables from inside the chassis, and then detach the cable from the side of the chassis.
Pull the bezel ear just enough to access the cable connector inside the ear.
Disconnect the front I/O cable from the ear.
To replace the component, reverse the removal procedure.