Installing a 12G SAS Expander Card
- For 24SFF configurations, install 8SFF front drive cages in boxes 1 and 2.
- For configurations including a 2SFF rear drive cage, install the drive cage over the power supplies.
- HPE recommends installing the SAS expander card into slot 3 of the primary PCIe riser expansion card.
- To ensure that cables are connected correctly, observe the labels on the cable and port.
- Be sure that you have the latest firmware for the controllers and the expander card. To download the latest firmware, see the Hewlett Packard Enterprise website.
Prerequisites
Before you perform this procedure, make sure that you have the following items available:
The components included with the hardware option kit
- Storage cables for each drive box
- A storage controller
Procedure
-
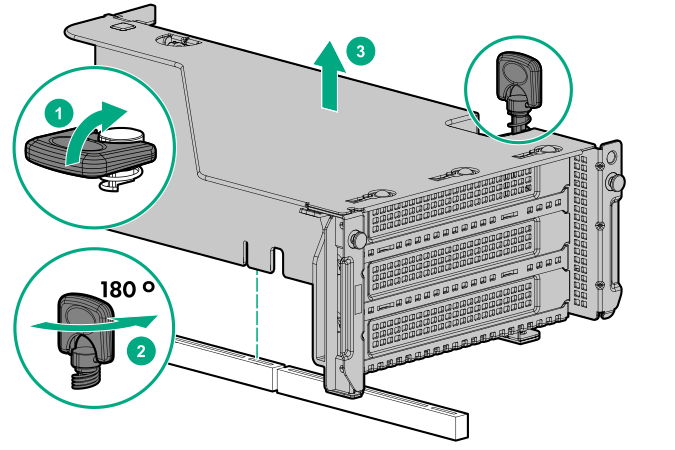
Remove the riser cage.
-
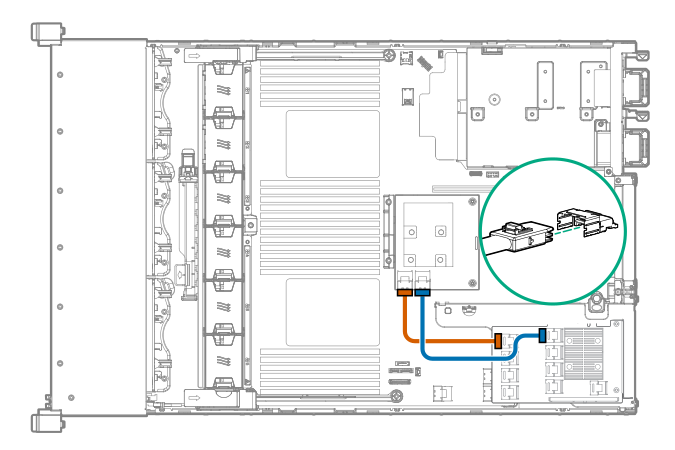
Connect cables from the 12G SAS expander to the controller.
-
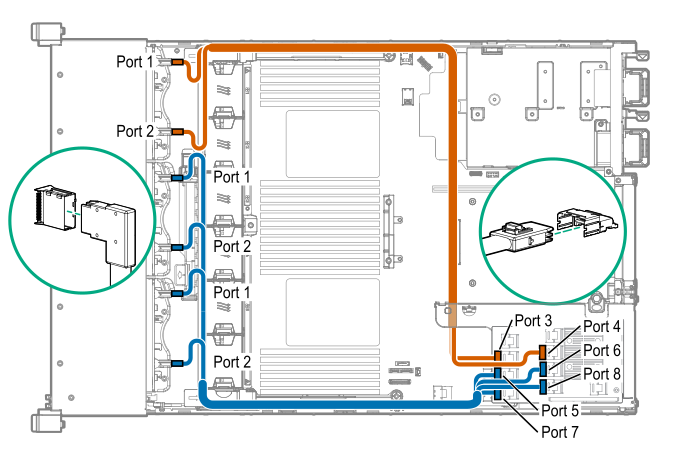
Connect cables from the 12G SAS expander to the drive backplanes.
A standard configuration is shown. For additional cabling diagrams, see Cabling diagrams.
The installation is complete.