Installing a midplane 4LFF SAS/SATA drive cage
Observe the following:
- A 1U heatsink is required for each processor when installing this option.
- If you have a TPM, install it prior to this option.
- If you have a type-a controller, install it prior to this option.
Prerequisites
Before you perform this procedure, make sure that you have the following items available:
The components included with the hardware option kit
Procedure
-
Remove the air baffle.
The air baffle is no longer needed. The drive cage acts as an air baffle for the server.
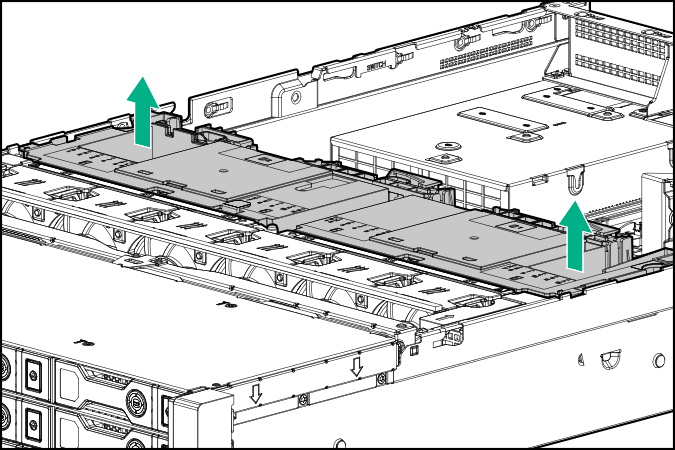
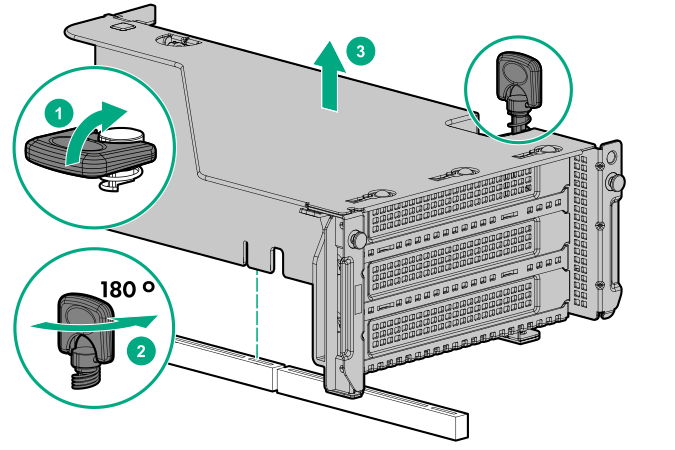
-
Remove all riser cages.
-
Install the drive cage:
CAUTION: Do not drop the drive cage on the system board. Dropping the drive cage on the system board might damage the system or components. Remove all drives and use two hands when installing or removing the drive cage.
- Pull the plunger pin on the rear right of the drive cage and then lower the drive cage until the plunger pin engages.
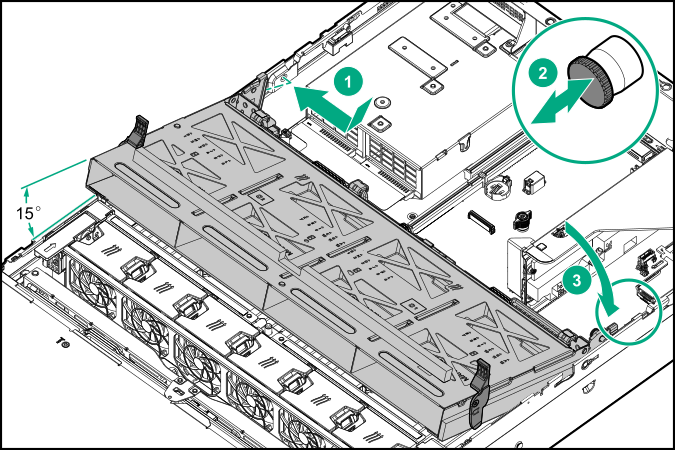
- Pull the plunger pin on the rear right of the drive cage and then lower the drive cage until the plunger pin engages.
-
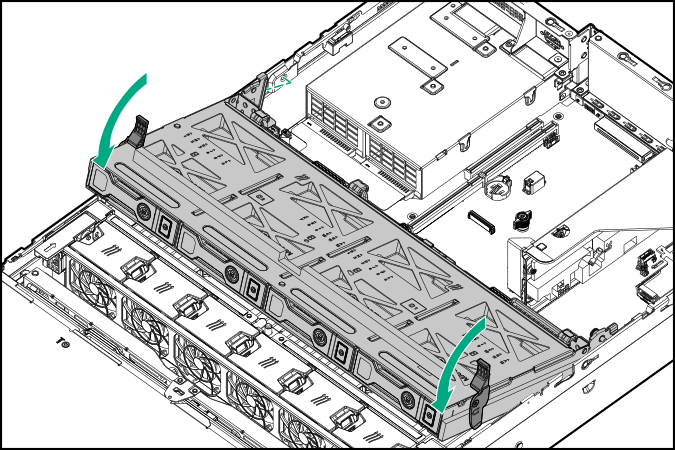
Push down on the latches to lower the drive cage into place.
The installation is complete.