OPC UA Server Hierarchy
Estimated reading time: 2 minutes
OPC UA server hierarchies involve different types of nodes that map to OPC UA clients.
Types of Nodes:
- Folder to represent an industrial plant
- Devices to represent devices with sensors on the plant floor (such as a boiler)
- Tags to collect data from specific registers in the devices (such as temperature or pressure)
#
Add a Node
To add a node:
- In the navigation panel, go to OPC UA > Hierarchy.
- Click on a parent node in the hierarchy.
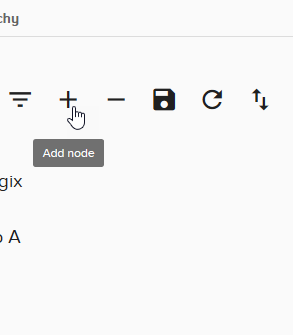
-
Click + to add a new node.
The new node will have folder1 as a parent node in the below screenshot.
-
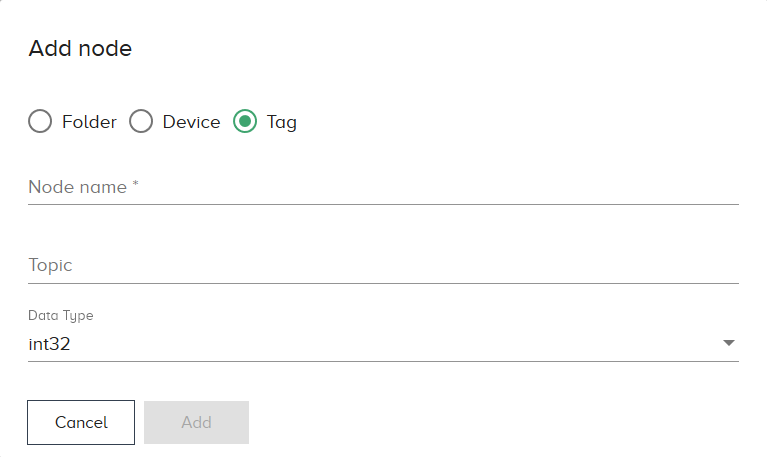
Select the node type. Enter the required information. Click Add.
- Click
 to save your changes.
Delete a Node
To delete a node:
- In the navigation panel, go to OPC UA > Hierarchy.
- Select a node.
-
Click - to delete the node and all of its children. This example below will delete folder1 and device1:
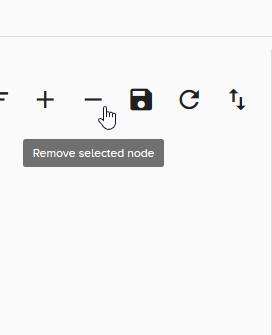
The - button will immediately delete the node and all of its children with no confirmation. Changes do not stick until you click
. If you click - by mistake, don’t panic, simply navigate away from and back to the hierarchy page. - Click to save your changes.
Reset and Import Nodes
To reset and import nodes:
- In the navigation panel, go to OPC UA > Hierarchy.
-
Click
 to reset the hierarchy and remove all nodes.
Changes do not stick until you click
. If you click by mistake, don’t panic, simply navigate away from and back to the hierarchy page. -
Click
 to import nodes based on your DeviceHub configuration. Click Yes to confirm the import.
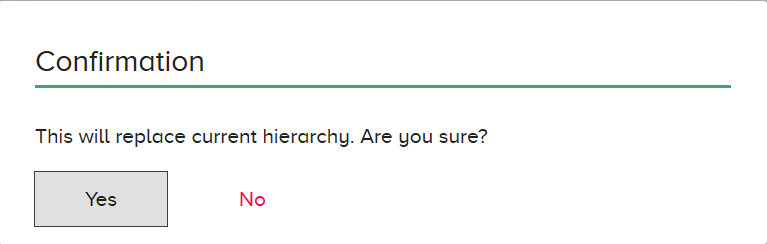
-
The hierarchy will create nodes based on devices and tags under a OT Link Platform node.

You can always rename the OT Link Platform node in the Configuration tab on the right.